

We’ve said it before, and we’ll say it again — everyone loves credentials. Credentials are the glazed donut of data types.
Data Breach Investigations Report
Remember this quote from Verizon's Data Breach Investigations Report (DBIR) every time you want to create a simple password or reuse it. This study has been carried out for the past 14 years. It analyzes thousands of cybercrimes linked to data breaches and provides valuable insights into password security. Cybersecurity specialists harness the power of the following statistics to enhance their systems’ security.
- 74% of website breaches took place because of stolen credentials or brute force attacks.
- Phishing is still one of the most popular means of stealing user data like login credentials or credit card numbers.
In 2023, 25% of data breaches occurred due to phishing attacks. Stolen credentials accounted for the majority of data breaches over the past few years.
GoodFirms revealed a new study on Top Password Strengths and Vulnerabilities in 2023. The study attempts to understand the current password behavior of online users as well as password management vulnerabilities. Below are the results obtained from the survey:
- 62.9% of users change their passwords only when prompted
- 30% of users have experienced data breaches due to weak passwords
- 45.7% of users reuse passwords for multiple sites and applications
- 52.9% of users share their passwords with family members, friends, and colleagues
- 35.7% of users still jot down their passwords on sticky notes, paper, or planners
Obviously, most companies know about the main causes of data breaches, and they’re trying to enhance their security systems, but the situation is not getting better from year to year.
We could cite even more studies, but it’s obvious that input field asterisks are causing too many problems for both users and companies.
You may think that the data breach is just a recent problem, but let’s turn back the hands of time. Bill Gates brought up the subject of password vulnerabilities and predicted the death of passwords in 2004. And in 2011, IBM said that passwords would become useless in five years. In 2014, Avivah Litan, VP Analyst at Gartner, expanded on the passwordless argument. In her words, “Passwords were dead a few years ago. Now they are more than dead."
But today, passwords remain the most popular authentication method; they are not going to disappear. Taking into account all the data above, the human factor is the main cause of data breaches. I think it’s not hard to guess how many data breaches occur due to the human factor, but we know the exact number. According to the DBIR, it's behind 74% of all data breaches.
Today, we're going to explore passwordless authentication methods that can help fix the data breach problem. Let's dive deeper into the issues and find out what passwordless authentication is and how to implement it in software solutions.
What is passwordless authentication?
Passwordless authentication is a means of verifying a user's identity without using a password. Passwords aren't used as an alternative authentication factor or even as a backup. It's important to understand this point, as some tech providers claim their authentication is passwordless when it isn't.
The idea of passwordless authentication has been on the market for quite a long time. There are now dozens of ways to verify a user’s identity without a password. Two top means of doing so are:
- Biometric authorization (fingerprint, face recognition)
- Certificate-based authentication
However, there are other means that are considered common passwordless authentication methods, but in fact, they are not:
- Magic links
- One-time passwords
These methods aren’t completely passwordless (see more below), but that doesn’t mean they’re bad.
Here's how passwordless authentication works
Each passwordless authentication method uses a unique algorithm. Generally, the system generates two cryptographic keys (one private and one public) when a user signs up to verify their identity. A user keeps a private key, and a public key is stored on the app’s server.
Whenever a user logs in, they must unlock their private key by performing specific actions, such as scanning a fingerprint. Once the private key is unlocked, the system matches it with the public key. If the key pair is matched, the user is successfully authenticated and can use the app.
Note that the user’s private data never leaves their device. Their fingerprint is only used to unlock the private key.
When it comes to the web, Google and Apple have successfully implemented biometric authentication via fingerprint or Face ID. But those methods haven’t become more popular than magic links. Magic links work similarly to the previous method, but they involve an intermediary — an email.
Here’s how magic links work step-by-step:
- A user enters an email address.
- Magic sends an email to the address to verify a user’s identity.
- Once the user’s device or browser is authenticated, private and public keys are generated and stored in the browser. The key pair is generated and stored on the client side in an embedded iframe, and developers cannot access it. Putting it simply, Magic cannot get access to the keys. Instead, the Magic SDK uses a private key to generate a Decentralized ID (DID) token.
DID tokens are cryptographically generated proofs for managing user access to the application’s resource server. Leveraging the Ethereum blockchain, the DID token created by the Magic SDK can generate verifiable proofs of authorization and identity.
These proofs are encoded in a lightweight digital signature that can be shared between server and client to protect routes and resources, manage permissions, and authenticate users. In short, the DID token serves as a user’s digital signature. Once generated, the system sends the token to the server to verify the user. Even if hackers obtain this token, they will still be unable to access the private key.
Further, this token is passed to the server to verify the user. Magic stores the user's email and ID in the browser’s IndexedDB. However, some information is stored in cookies and localStorage for accurate and correct performance.
Magic links have one disadvantage: they are not fully passwordless. If a hacker gains access to a user’s email account, they can click the link and gain access to the app, platform, or service. There are also ways to secure access to your email, including:
- Enable multi-factor authentication for your email
- Use trusted email providers
Moreover, developers can generate one-time links with an expiration date. While there are some drawbacks, magic links still outperform weak or reusable passwords. Hackers cannot leverage phishing attacks or brute force when it comes to magic links. Those attacks just don’t work with magic links. All that users need to do is secure their email accounts.
Pros and cons of passwordless authentication
Eliminates account takeovers from credential attacks
Having watched tons of movies, a vast majority of people imagine hackers as kids skipping school, wearing dark hoodies, and using tons of tech buzzwords. In the real world, they are swindlers who probably have never written something more complex than “Hello, world!” and who are leveraging the power of social computing. Hence, such “hackers” aren’t likely to steal the mathematical representation of fingerprints.
Improves user experience
Using a fingerprint scanner or Face ID and entering an email address is easier than remembering hundreds of passwords, looking for a sticker with them, or resetting them.
Saves time and money
Users are likely to forget their passwords, and they do it on a regular basis. 20–50% of all support calls are associated with password resetting.
When resetting a password, no one thinks about how much it can cost a business. On average, a single password reset costs an enterprise up to $70. When estimating the reset cost, we need to consider several factors, including the salaries of support center staff (they're quite high). Some companies have built an authentication and authorization infrastructure (AAI), which is both a service and a procedure that secures access to protected information distributed on the company’s web servers. In those situations, if an employee forgets their password, they won’t be able to complete their duties. Thus, the employee is wasting their working time while waiting for a password reset. Considering that some users reset their passwords more than 50 times a year, that’s a lot of time and resources just pouring down the drain. Overall, enterprises can spend more than $1 million annually on password reset support.
Along with benefits, there are some drawbacks of passwordless authentication to consider:
- High cost to implement an enterprise-wide passwordless authentication
- Technical issues connected with the loss of devices or access to an email box
Top considerations for implementing passwordless authentication
This is the point when we need to shift from a theoretical view to a practical one. Jumping ahead a bit, we’re going to discuss how to implement passwordless authentication via magic links. It’s probably the easiest way to implement passwordless authentication.
Today, we’ll discuss how to create two pages: one for sign-in/login and the other for the homepage (only for logged-in users).
I will use Next.js, but you can use any framework you prefer. There won’t be anything complicated.
Let’s start and generate a project: npx create-next-app magic.
While the project is being generated, we need to go to https://magic.link/ and click Get started. You need to sign up then. Right after signing up, you’ll be automatically redirected to the dashboard. There are many tabs on the left, but you only need the API key from the Home tab. Just copy it and go back to your project.
Set up the needed dependencies:
npm i magic-sdk or yarn add magic-sdk
Add the API key you copied before to the environment variables. Create a .env file in the root folder and write the following code there:
NEXT_PUBLIC_MAGIC_API_KEY=your API keyNote that you need to add pa article NEXT_PUBLIC in NextJS. Otherwise, it won’t be defined.
Then, we need to create a new file, lib/magic.js:
import { Magic } from 'magic-sdk';

const createMagicClient = () => {
   return (
       typeof window !== 'undefined' &&
       new Magic(process.env.NEXT_PUBLIC_MAGIC_API_KEY)
   )
}

export const magic = createMagicClient();
You still need to do some routine work to let the magic of passwordless authentication happen. Create two pages:
1. Login page pages/login/index.js, a simple form for entering an email address.
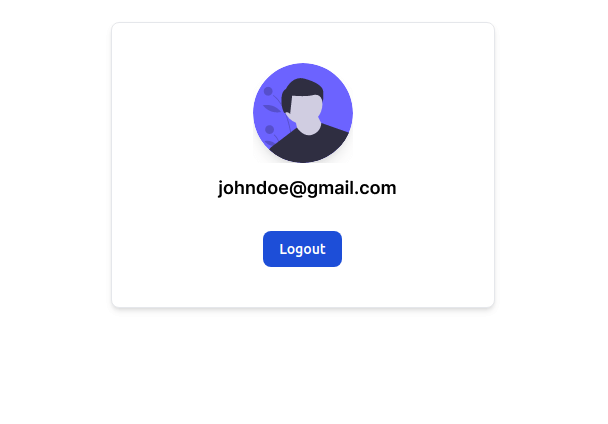
2. A homepage pages/index.js, which is only for logged-in users and will display a user’s email address.
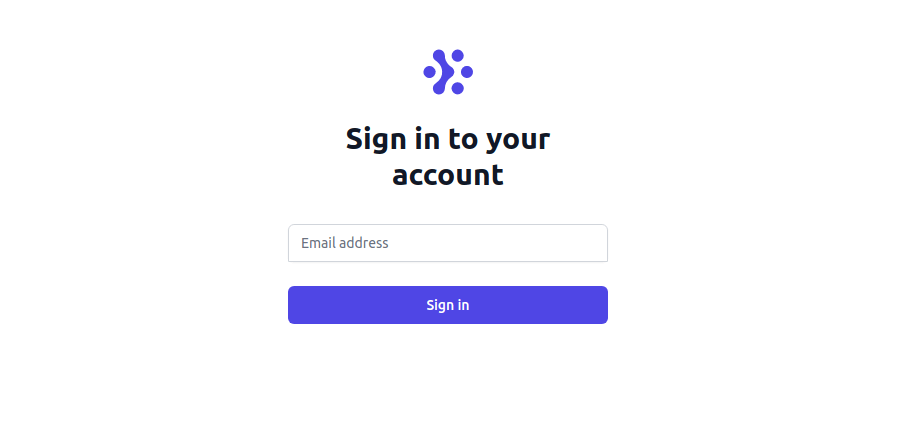
Here is the code for a login page:
return (
   <div>
     <Head>
       <title>Login</title>
     </Head>
     <div className="min-h-full flex items-center justify-center py-12 px-4 sm:px-6 lg:px-8">
       <div className="max-w-xs w-full space-y-8">
         <div className='flex flex-col'>
           <Image
             height={100}
             width={100}
             className="mx-auto h-12 w-auto"
             src="https://tailwindui.com/img/logos/workflow-mark-indigo-600.svg"
             alt="Workflow"
           />
           <h2 className="mt-6 text-center text-3xl font-extrabold text-gray-900">
             Sign in to your account
           </h2>
         </div>
         <form className="mt-8 space-y-6" onSubmit={submitHandler}>
           <div className="rounded-md shadow-sm -space-y-px">
             <div>
               <input
                 type="email"
                 required
                 onChange={changeHandler}
                 className="
               appearance-none rounded-none
               relative block w-full
               px-3 py-2 border
               border-gray-300
               placeholder-gray-500
               text-gray-900 rounded-t-md
               focus:outline-none
               focus:ring-indigo-500
               focus:border-indigo-500
               focus:z-10 sm:text-sm"
                 placeholder="Email address"
               />
             </div>
           </div>

           <div>
             <button
               type="submit"
               className="
           group relative w-full flex justify-center py-2 px-4 border border-transparent
           text-sm font-medium rounded-md text-white bg-indigo-600 hover:bg-indigo-700
           focus:outline-none focus:ring-2 focus:ring-offset-2 focus:ring-indigo-500
         "
             >
               <span className="absolute left-0 inset-y-0 flex items-center pl-3"></span>
               Sign in
             </button>
           </div>
         </form>
       </div>
     </div>
   </div>
 );
There is no need to write CSS on our own. It’s better to leverage Tailwind.
And here is the logic that the component executes:
const [email, setEmail] = useState('');
 const router = useRouter();

 const changeHandler = (event) => {
   setEmail(event.target.value);
 };

 const submitHandler = async (event) => {
   event.preventDefault();

   try {
     const didToken = await magic.auth.loginWithMagicLink({ email });
     if (didToken) router.push('/');
   } catch (error) {
     console.error(error);
   }
 };
Let’s get back to the browser and go to localhost:3000/login.
And now, if you enter your email address in the input field and click on the Sign in button, you will see this:
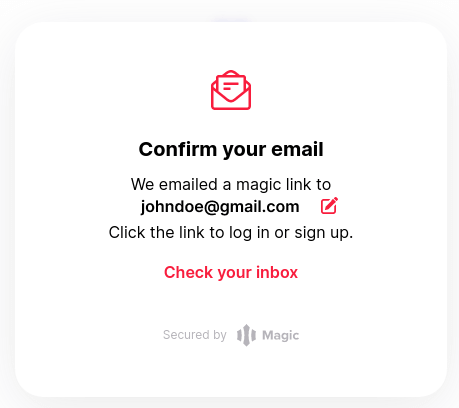
After clicking on the button, you have 15 minutes (that’s the usual lifetime of the DID token) to check your email inbox. You will receive an email with the magic link to complete the authentication process.
After authentication, you need to return to the dashboard and check the Users tab to make sure that the registration is completed. If your email address is there, the registration is successful.
Let’s get back to the form handler. If the authentication is successful, loginWithMagicLink returns the DID token that is used to check the status of the request.
If we receive the token, then we make a redirect to the homepage. If an error occurs, there won’t be any action.
The homepage code looks like this:
return (
   <>
   <Head>
     <title>Home</title>
   </Head>
   <div className={styles.container}>
     <div
       className="
         max-w-sm bg-white rounded-lg border
         border-gray-200 shadow-md dark:bg-gray-800
         dark:border-gray-700 m-auto mt-12
       "
     >
       <div className="flex flex-col items-center pb-10 px-4 pt-10">
         <Image
           height={100}
           width={100}
           className="w-24 h-24 rounded-full shadow-lg"
           src="/avatar.svg"
           alt="Bonnie image"
         />
         <h5 className="mb-1 mt-3 text-xl font-medium text-gray-900 dark:text-white">
           { email }
         </h5>
         <div className="flex mt-4 space-x-3 lg:mt-6">
           <button
             onClick={handleSignout}
             className="
               inline-flex items-center
               py-2 px-4 text-sm font-medium
               text-center text-white bg-blue-700
               rounded-lg hover:bg-blue-800
               focus:ring-4 focus:ring-blue-300
               dark:bg-blue-600 dark:hover:bg-blue-700 dark:focus:ring-blue-800"
           >
             Logout
           </button>
         </div>
       </div>
     </div>
   </div>
   </>
 );
We need to use the getMetadata method to display the user’s email.
useEffect(() => {
   const getData = async () => {
     try {
       const { email } = await magic.user.getMetadata();
       setEmail(email);
     } catch (error) {
       console.log("Error", error);
     }
   };

   getData()
 }, []);
As you can see, there are not too many functions to discuss, so let’s move on to logout. The user obviously won’t like the idea of manually cleaning up IndexedDB, so you need to implement the logout method that will clean everything up automatically.
const handleSignout = async (e) => {
   e.preventDefault();

   try {
     await magic.user.logout();
     router.push('/login');
   } catch (error) {
     console.error("Error", error);
   }
 }
Last but not least, we need to protect our page from unauthorized users. You can use isLoggedIn to secure your page. To implement that solution, add this code to pages/_app.js:
 const router = useRouter();
 useEffect(() => {
   const checkAuth = async () => {
     const isUserLogged = await magic.user.isLoggedIn();

     if(isUserLogged) {
       router.push('/');
       return;
     }
     router.push('/login');
   }
   checkAuth();
 }, []);
Magic SDK provides everything you need for passwordless authentication. There is nothing more to add. Check the results of our work here.
A final note
Instead of closing with a long paragraph, here’s the link where you can test all your passwords to see if they’ve been compromised.
To sum up, we have covered how to implement practical passwordless authentication in an application using magic links. You can follow a similar process to implement passwordless authentication today!