

So, your Android app is built, polished, and ready to hit the market. Next up is publishing it on the Google Play Store — a task that may seem daunting at first. We get it: if you do it wrong, your app may never see the light of day.
Don’t worry — we’ve got you covered. Today, we will guide you through a smooth launch on the Google Play Store, which is undoubtedly the leader in the number of published apps and users, with over 2.3 million apps.
Step 1: Create a Play Console developer account
Before diving into the specifics of publishing your app, let's make sure you have all the essentials in place. Creating a Google Play Console developer account is something you can (and should) do at the beginning of the app development process. Without it, you can't publish your app on the Play Store.
You can use any of your current Google accounts or create a dedicated one to sign up for a Google Play Console developer account. While both personal and corporate accounts can publish apps, you need to submit a formal transfer request to Google. To avoid this, choose the correct account type from the start.
Signing up for a Google developer account involves the following steps:
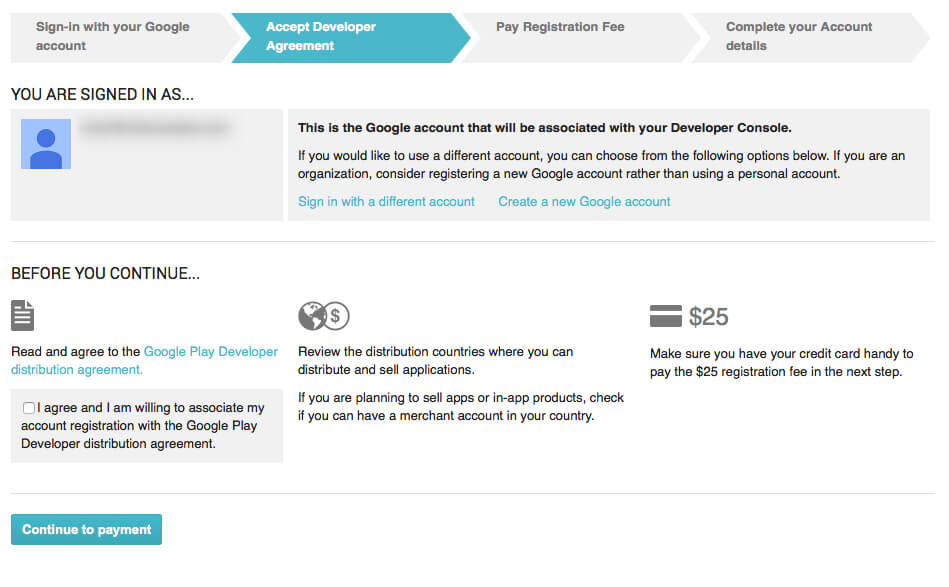
- You must be at least 18 years old to register.
- Agree to the Google Play Developer Distribution Agreement.
- Pay a one-time registration fee of $25.
- Choose between a Personal or an Organization account.
- Provide required information: developer name, legal name and address, contact email, and phone number. Additionally, provide a government-issued ID for a Personal account or a government-issued ID + D-U-N-S number + official organization document for an Organization account.
- In the Declarations section, acknowledge the Developer Program Policies and US export laws, and accept the Play App Signing Terms of Service.
- Personal account holders created after November 13, 2023 must also meet app testing requirements and verify access to a real Android device using the Play Console mobile app before publishing.
💡 Finance, health and medical applications, VPN, and government apps require an Organization account. You cannot publish these app types under a Personal account.
In 2025, Google introduced a new mandatory program requiring all developers to verify their identity and register their app's package names. For Play Console developers, most of this happens automatically — Google will register your apps using the information you provide during account setup. Starting in late 2026, apps must be registered by a verified developer to be installed on Android devices in several regions, with a global rollout to follow. Make sure your legal name, address, and government ID are accurate when registering, as this information will be used for verification.
Typically, it takes from a few hours to a few days to get your account approved by Google. If there are any issues with identity verification or payment processing, expect the approval process to take longer.
Step 2: Set up a payments profile
If you plan to sell paid apps or in-app purchases, you need to create a payments profile. This will help you manage app sales, track revenue, and receive payouts.
- Go to Settings
- Click Payments profile
- Create a payments profile
You'll need your legal business name, a valid physical address (PO boxes are not accepted), and a bank account registered in the same country as your payments profile.
Once you finish, the payments profile is automatically linked to your Play Console account. If you've previously set up a payments profile through another Google product, it's already linked.
💡 Google has recently introduced changes to its billing policies. As of late 2025, apps serving US users are no longer required to use Google Play Billing exclusively, and developers in the EEA can offer alternative billing options under DMA compliance rules. Check Google's current Payments policy for details relevant to your region.
Step 3: Prepare the documents
Before publishing, you need to prepare legal documents, such as an End User License Agreement (EULA) and Privacy Policy. Based on our experience, we highly recommend starting to prepare these documents in advance. If these documents aren't ready upfront, you may have to pause submission or make last-minute edits.
You can use documents from similar apps as references and create your own based on them, or ask a lawyer to make everything from scratch.
End User License Agreement (EULA)
EULA is an agreement between a product owner and a user of the product. In brief, it contains:
- What the users can do with the app and what they aren't allowed to do
- Licensing fees
- Third-party services your app relies on, etc.
Privacy Policy
A Privacy Policy is a legal document that outlines how your app collects, uses, stores, and shares personal information from its users.
Make sure to include the following information in the Privacy Policy:
- A complete list of personal data that is collected, processed, and used through the app
- Technical information that is collected about the device and the installed OS
- Functional features of the app, its paid and free functionality
- Place of registration of the company and/or location of the copyright holder of the application
- The chosen legal system and legislation that will be applied in resolving disputes and regulating legal relations
- The terms of the subscription
- Citizenship (residence) of the overwhelming majority of application users
- Age criteria, the presence of specific content
- Data retention practices and, if your app allows account creation, a clear explanation of how users can request deletion of their account and associated data
Data Safety Form
The Data Safety Form declares what user data your app collects or shares, how it is used, and how it is protected. It must be consistent with your Privacy Policy.
Keep in mind:
- Even if your app collects no user data at all, you must still complete the form
- If your app allows users to create accounts, you must provide both an in-app account deletion option and a web-based deletion request page accessible without reinstalling the app
- You cannot submit your app for review until the Data Safety Form is approved
Terms of Use
While Google Play doesn't require you to have a Terms of Use document for your app, it's a highly recommended practice. Terms of Use or Terms and Conditions explain how users can interact with your app and what to expect. You can combine Privacy Policy and Terms of Use into a single document, with separate chapters for each.
Step 4: Study Google developer policies
By this time, you must have a well-defined understanding of your product concept. Now you need to make sure that all the planned features comply with the Google Developer Policies. These documents explain how mobile apps need to be developed, updated, and promoted to support the store's high-quality standards. Making sure your app doesn't violate any of the policies is one of the crucial steps for a smooth submission process.
If Google decides that your product violates any of its policies, your app may get rejected, blocked, or even deleted from Google Play. Besides, numerous and repetitive violations may lead to account termination.
Be sure to review all the available information about:
- Restricted content definition
- App store listing and promotion
- Impersonation and intellectual property
- Rules for monetization and ads
- Privacy, security, and deception regulation
- Spam and minimum functionality
- AI-Generated Content
- Child Safety Standards
Google is constantly refreshing its policies, so it's important to monitor the changes even after your Android app is released.
Step 5: Technical requirements
Before moving on to the upload process, make sure you have also taken care of the following things:
- Unique bundle ID — The package name uniquely identifies your app on the Google Play Store. Since you can't edit it once your app is published, make sure to choose a name that will be relevant for your app throughout its entire lifecycle. You can set the package name in the application's manifest file. Package names are also registered as part of Android's new developer verification program, and Play Console handles this automatically for new apps.
- Every application should be digitally signed with a developer's certificate. The certificate is used to identify the author of an app and cannot be generated again.
- The app size — Google has limits on file sizes, allowing up to 200MB for apps published as app bundles, and 100MB for apps still using APKs (applicable only to apps created before August 2021). The app bundle itself can be larger than this limit, Google generates optimized APKs per device from it.
- The file format — Google accepts two release formats, including app bundles (.aab) and APKs. However, .aab is required for all new apps. To use this format, you need to enroll in Google Play app signing.
- Target API level — New apps and app updates must target Android 15 (API level 35) or higher to be submitted to Google Play.
- 16KB page size support — Starting November 1, 2025, all new apps and updates targeting Android 15+ submitted to Google Play must support 16KB memory page sizes. This affects apps that use native code (C/C++ via the NDK). Apps written entirely in Java or Kotlin are already compliant.
- VersionCode limit — Every app bundle and APK has a versionCode in the manifest file that must be incremented with each update. The maximum allowed value is 2,100,000,000. Exceeding it will prevent new submissions.
You can learn more in Google's official developer documentation, specifically the Prepare for your app release guide.
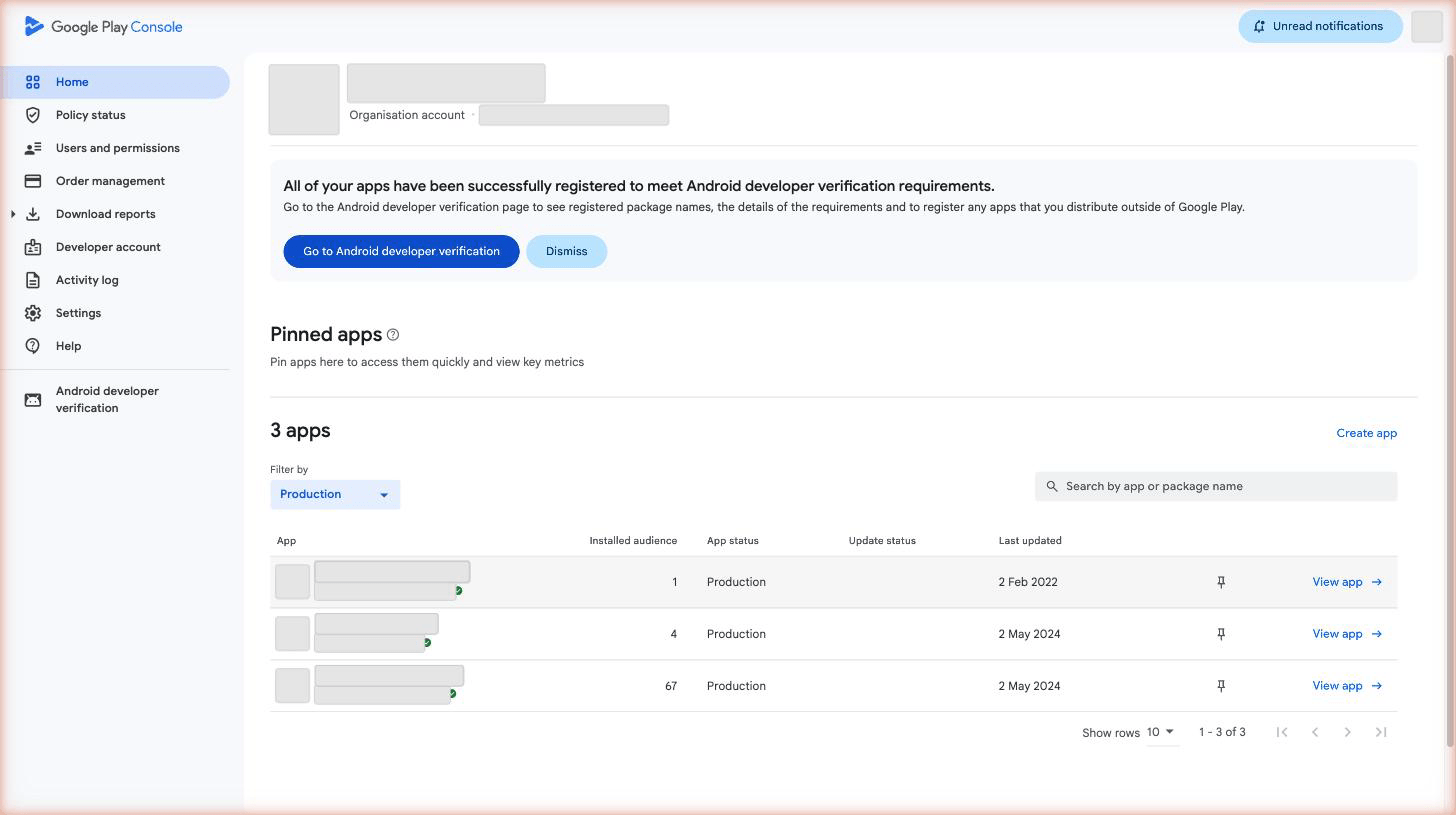
Step 6: Creating the App on Google Play Console
When you have the file lined up, you need to create a brand new app listing in your Developer Account. Here's how to do it:
- Open Play Console and select Home
- Now select Create app
- Choose the app’s default language from the drop-down menu
- Add the name as you want it to appear on Google Play (you can change this later)
- Specify whether your application is an app or a game, and whether it is free or paid (you can change these later).
- Add a contact email address that Play Store users can use to reach you about the app
- In the Declarations section: acknowledge the Developer Program Policies and US export laws, and accept the Play App Signing Terms of Service
- Click Create app
After this, select Dashboard on the left menu. This is the central checklist that guides you through all the remaining setup steps before your app can go live.
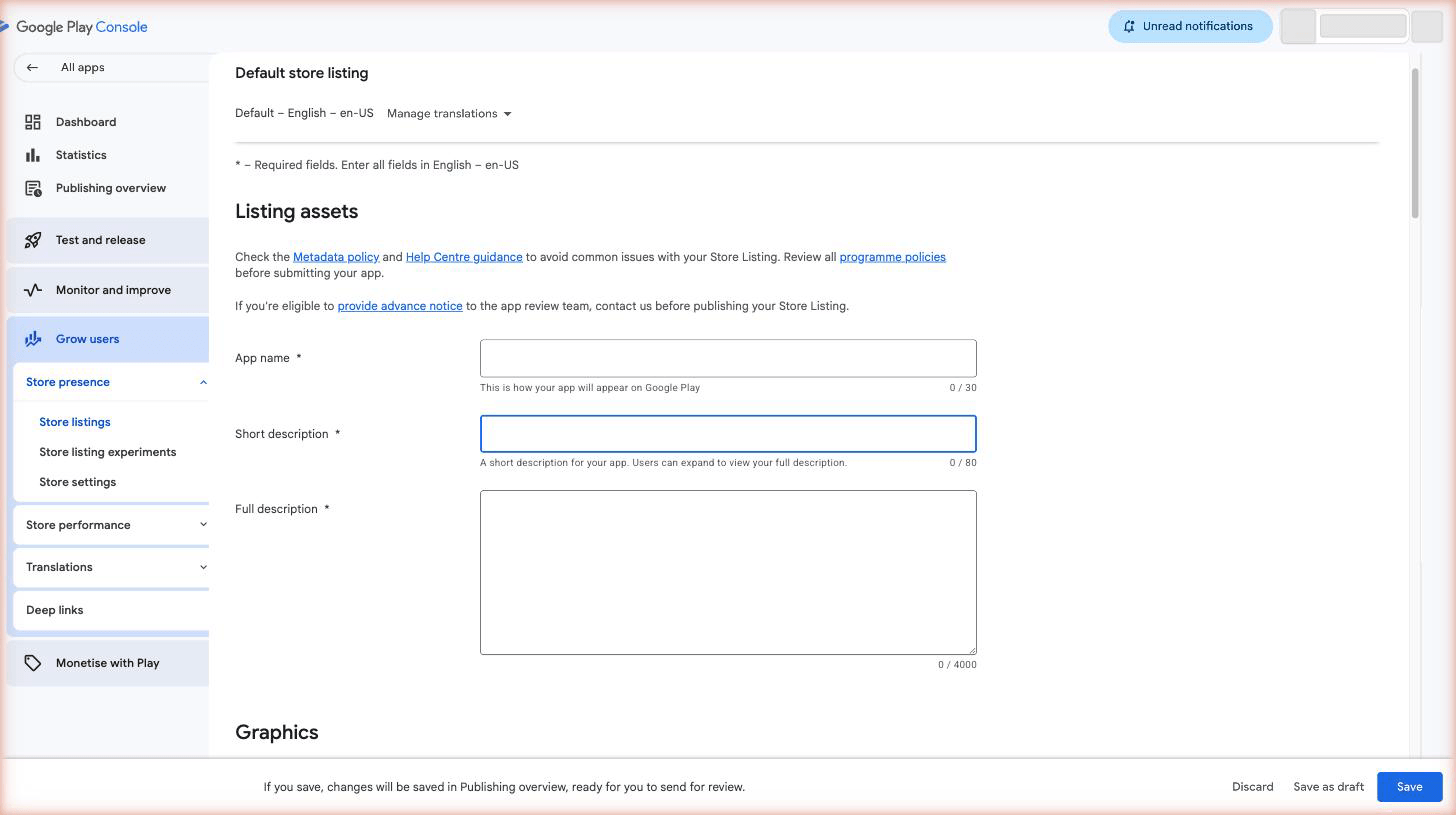
Step 7: Prepare store listing
Your app listing contains the information necessary for app store optimization (ASO) and provides users with more insights into your app before they download it.
The Dashboard guides you through all required tasks with a checklist. Mandatory items must be completed before your app can go live. Completed tasks are marked with a green tick. You may need input from a designer and a copywriter, so it's better to start preparing the following materials in advance.
By publishing on Google Play, you now grant Google a license to use your app's icon, screenshots, and videos for promotional purposes across Google services. If you'd like to restrict this, you can uncheck the External marketing box in Store settings.
Product description
It contains an app name (30 characters or less), a brief description (up to 80 characters), and a full description (up to 4,000 characters). Avoid keyword stuffing. Focus on writing clear, engaging copy — relevant keywords will naturally align with well-written content.
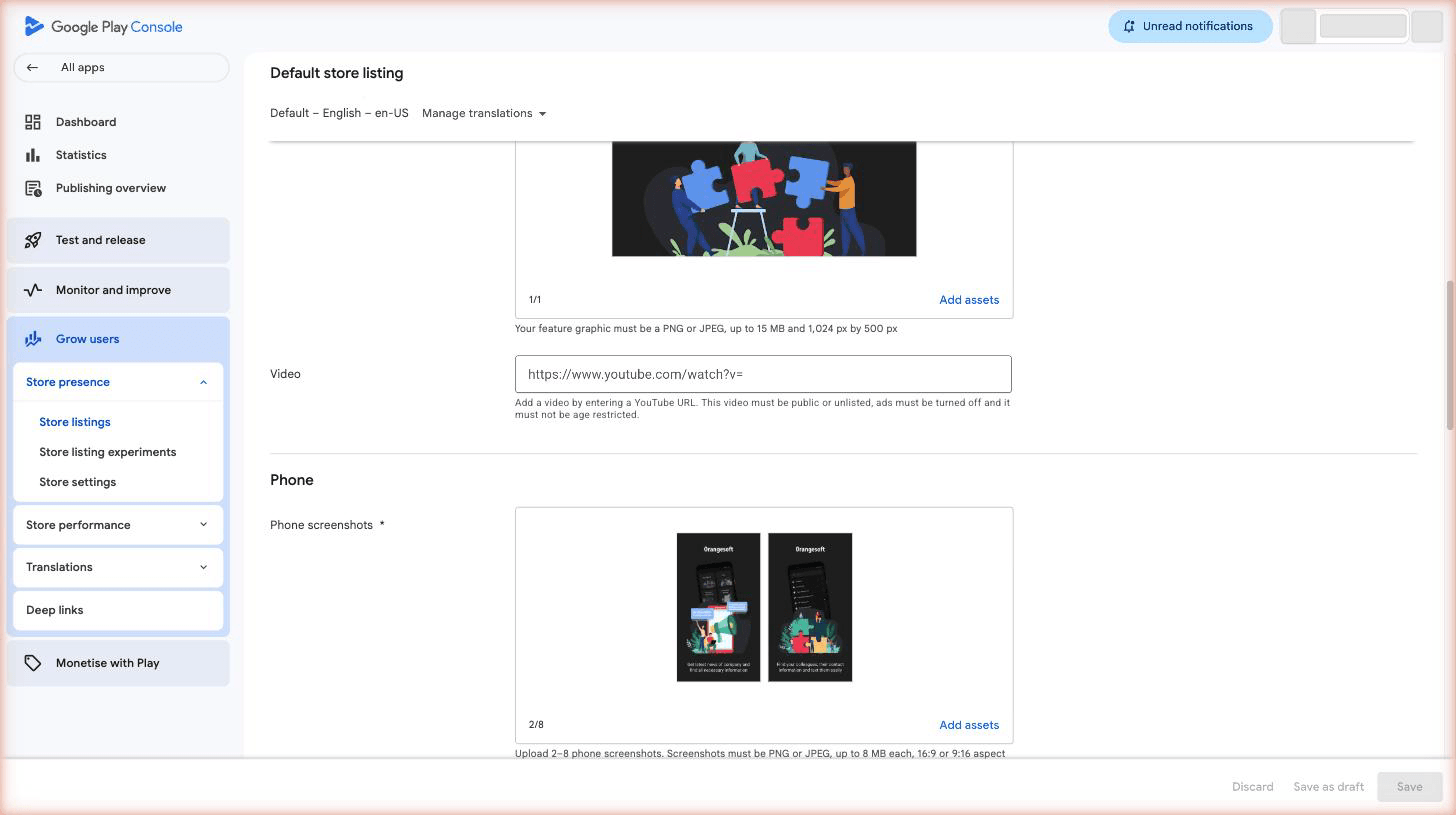
Screenshots
You can upload from 2 to 8 screenshots per device type. For apps, we recommend that you upload at least four screenshots with a minimum resolution of 1080px. These should be 16:9 for landscape (minimum 1920x1080px) screenshots and 9:16 for portrait screenshots (minimum 1080x1920px).
Make sure your screenshots reflect the actual in-app experience as well as showcase the core features and content.
Add alt text for each screenshot and graphic asset for accessibility, using 140 characters or less.
Icon
For an app icon, the requirements are the following:
- 512px by 512px — that's big enough to look sharp everywhere.
- 32-bit PNG (with alpha) — so it blends nicely with different backgrounds.
- Keep the icon under 1024KB for smooth uploads.
Do not use badges or text that suggest ranking, price, or Google Play categories in the icon because this must comply with the Metadata policy.
Feature graphic
The feature graphic is a required promo image that appears in curated collections, ad formats, and other places on Google Play. Without it, you cannot publish your store listing.
The requirements for the feature graphic are the following:
- JPEG or 24-bit PNG (no alpha)
- 1024px x 500px
Keep key visuals centred and avoid placing important elements near the edges, as the image may be cropped depending on the format.
Promo video
Add a link to a specific YouTube video URL (not a channel or playlist URL) in the app listing. The video will appear before your screenshots on your app's store listing. Make sure ads are disabled on the video, or it won't be shown on Google Play. For Android XR apps, you can add up to two additional XR-specific videos.
Tags
Unlike some app stores, Google Play doesn't allow custom keywords. You can choose up to 5 tags from a predefined list — selecting the most accurate tags will significantly boost your App Store Optimization (ASO) and help users discover your app. Google also supports accessibility tags such as Screen reader-friendly, Visual assistance, and Motor assistance, to help your app reach users who rely on assistive technologies.
Localization
If your app targets users in multiple languages, you can add translations for your Store Listing, app strings, and in-app products directly in Play Console — either manually, through a free machine translation service, or via professional human translation.
Play Console can now automatically translate your app strings using Gemini at no cost. Translations are generated and integrated every time you upload a new app bundle, keeping everything up to date without extra effort.
If you add text translations without localized graphic assets, users will still see your default-language screenshots. So we highly recommend uploading localized screenshots and images for each market you're targeting.
If you need a completely different store listing for a specific country or region, not just a different language, you can handle it through Custom Store Listings.
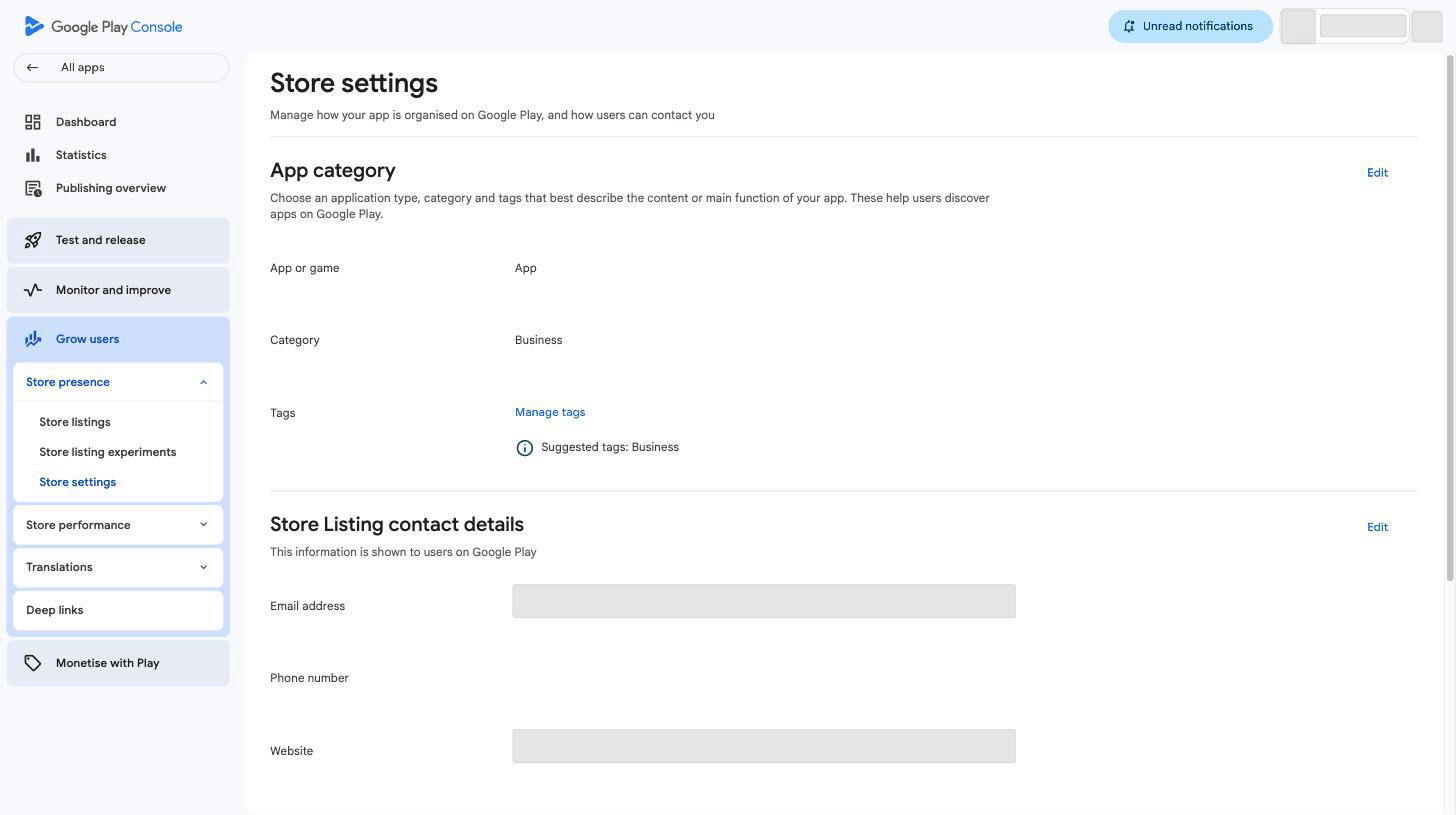
Application type and categorization
Select whether your application is a game or a non-game app, then pick the category that best fits your app's genre or purpose.
Contact details
Here, you should provide the support service contacts. By filling in the website URL, email address, and phone number, you make it easier for users to contact you if necessary.
Privacy Policy
Google requires you to add a link to your Privacy Policy in the designated field in Play Console. The policy must be hosted on a publicly accessible, non-geofenced URL; PDFs are not accepted.
While editing the Store listing, you can take a break at any moment, click Save Draft, and complete this stage later.
Step 8: Content rating
To ensure your app is visible on Google Play and avoid potential removal, you'll need to complete a Content Rating questionnaire. You can easily find this section on the left-side menu.
You must provide accurate information for the questionnaire, as any misrepresentation of your app's content might lead to suspension or removal of the Google Play account.
- Click on Save Questionnaire once you complete the survey
- Click on Calculate Rating
- Click on Apply Rating to confirm the rating and move forward with the pricing & distribution plan
Step 9: Pricing and distribution
In the Pricing and distribution section, you need to fill in the following information:
- Whether your app is free or paid
- The countries where your app will be available
- Whether your app will be available only on specific devices
- Whether the app has sensitive content and is not suitable for children under the age of 13
- Whether your app contains ads
Remember that you can change your paid app to a free one later, but a free app cannot be changed to a paid one. If you decide later that you want to distribute the app for a fee, you'll need to create a new app with a different package name.
Step 10: Prepare your release and send it for review
Finally, you are ready to upload your Android app file. In Play Console, go to the Testing section in the left menu and choose your track: Internal testing, Closed testing, Open testing, or Production. Near the top right of the page, click Create new release.
We highly recommend starting with Internal or Closed testing, because these allow you to test the app with a trusted group of users before going public. With Open testing, anyone can join as a tester and send feedback. Pre-release testing lets you gather feedback and fix issues before the full launch. Keep in mind that moving your app from a testing track to a Production release triggers a new review process.
Once you choose your track, do the following:
- Upload your app bundle (.aab) or an APK if your app was created before August 2021
- Name your release (visible only in Play Console, not to users)
- Add release notes in the 'What's new in this release' field, or leave it blank for your first release
- Click Next to go to the "Preview and confirm" screen and resolve any errors flagged before proceeding
- Click Start rollout (or Start rollout to production for your first public release)
Don't worry about missing crucial details. Play Console flags any critical issues before letting you submit. Once in review, your app's status will show In review on the Dashboard. Usually, it takes up to 2 days. Google states that the review process may take up to 7 days or longer in exceptional cases.
One useful new option: if a release is already fully live and you discover a critical bug, you can now halt the rollout directly from Play Console to stop further distribution while you prepare a fix.
Once approved, you'll receive a notification on the Google Console Dashboard.
Wrapping up
We hope this guide will help you get the publishing process right and put your amazing mobile product in front of Google Play Store users. However, remember that the journey does not end with publication. Making your mobile application a long-term success requires an ongoing effort from your development team. Prompt troubleshooting, constant updates, and new releases will keep your app thriving in the long run.
Orangesoft's team can help you keep a watchful eye on your app's performance post-release and continuously refine it based on user feedback. Let’s work together to launch and grow your app successfully.
This article was originally published on GoodFirms