

Your app is ready to make its entrance, and there's one more hurdle to overcome: the App Store. Although many app owners think that uploading the app to an app store is the easiest task of all, it's not that simple when you look into the app store review guidelines. From the app's Privacy Policy URL to app store screenshots, you'll need a lot of things to be lined up before submitting your app to the store.
Since 2011, our company has been developing mobile apps for global startups, and we know first-hand how tricky the submission process can be. So let us tell you how to upload an app to the App Store stress-free.
Four things you need to consider before submitting an iOS app to the App Store
Success on the App Store starts well before you hit the upload button. Here are a few basic things to cover before you upload your app to the App Store.
Prepare all the promotional materials
To help drive the discovery of your app and draw in as many early users as possible, your app will need an attractive marketing image. Apart from the app name and description, app marketing materials also include screenshots and promotional text. If your app is available in multiple languages, make sure to localize all materials for each target market. Keep in mind that the App Store has specific requirements for marketing materials.
Assign the app build to your account
You need to assign the latest app build to your Apple Developer account before submitting the app for review. To do that, you'll need a Developer account (necessary for accessing the App Store Connect dashboard) and a valid certificate. You can ask your app development team to create the required certificate and sign the build. For building and archiving, you can select a generic iOS device as a placeholder.
Meet all legal requirements
Apple pays particular attention to user data. Check out the Apple Developer Program License Agreement to find out more about data usage and storage, health research data protection, etc. Your iOS app must also comply with the legal requirements in the target country. You should also ensure that all app content is either original or legally licensed to avoid rejection by the App Store.
Check Apple’s official guidelines
Apple has special requirements for the quality of submitted apps and the detailed app information featured on the Product Page. Since the App Store is constantly changing, it's better to check out the latest requirements before each app submission.
How to publish an iOS app: nine steps
1. Create a developer account and access App Store Connect
Without a developer account, you won't be able to go through the app certification process. To join the Apple Developer Program and access App Store Connect, individuals and organizations must pay $99 per year. In addition to publishing apps, you also get many other benefits, like the ability to create Safari extensions, review advanced app analytics, access Beta versions of Apple software, and use TestFlight.
Right after you create a developer account, you get access to App Store Connect, where you can manage your apps and access all the information about them.
To enroll as a legal entity, you must undergo a verification process and obtain a D-U-N-S Number, a unique nine-digit business identifier. It’s better to get it beforehand since obtaining a D-U-N-S Number can take some time.
2. Create a new app and fill in the product page
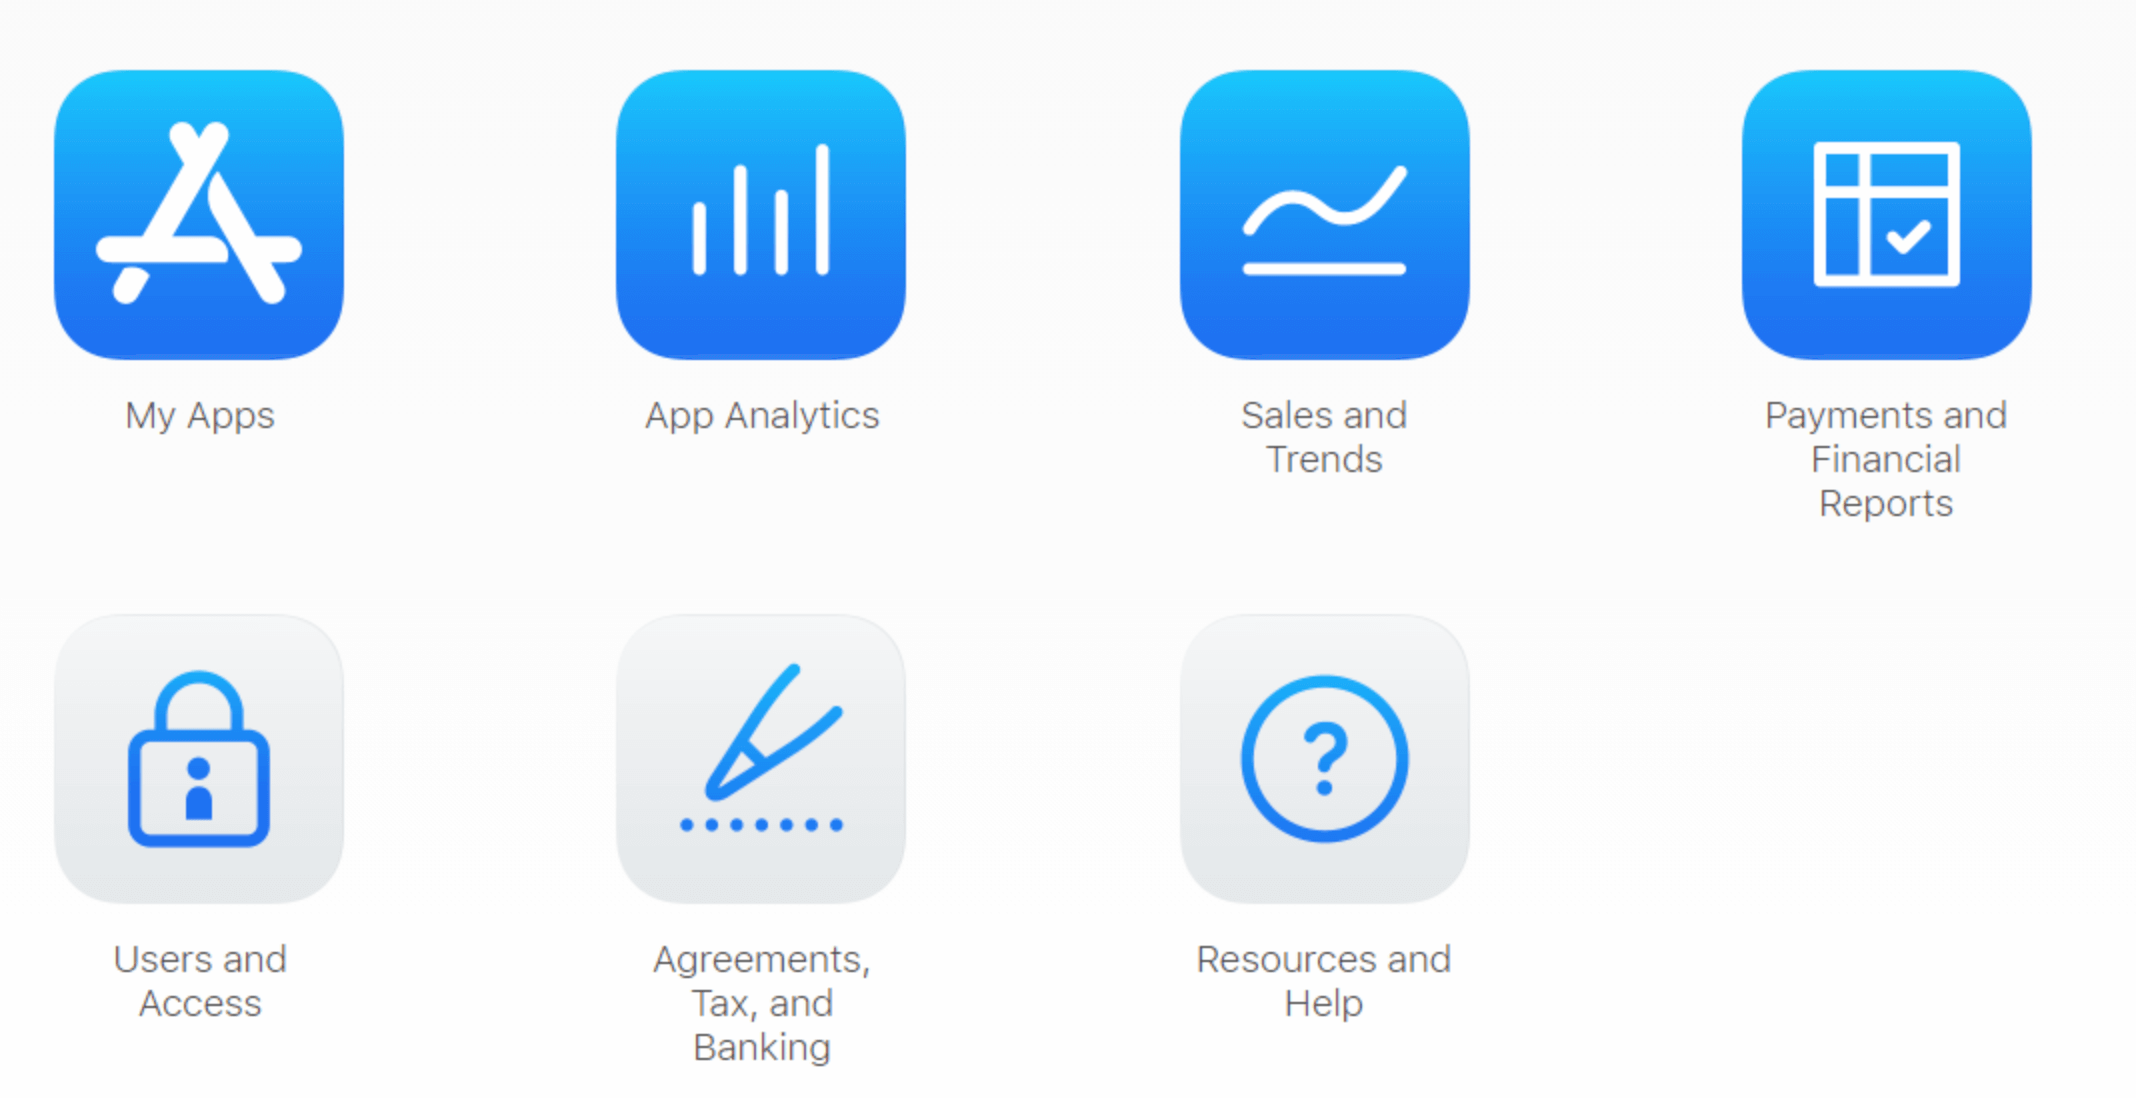
To create a new app, open My Apps, and tap the plus button in iOS App Store Connect.
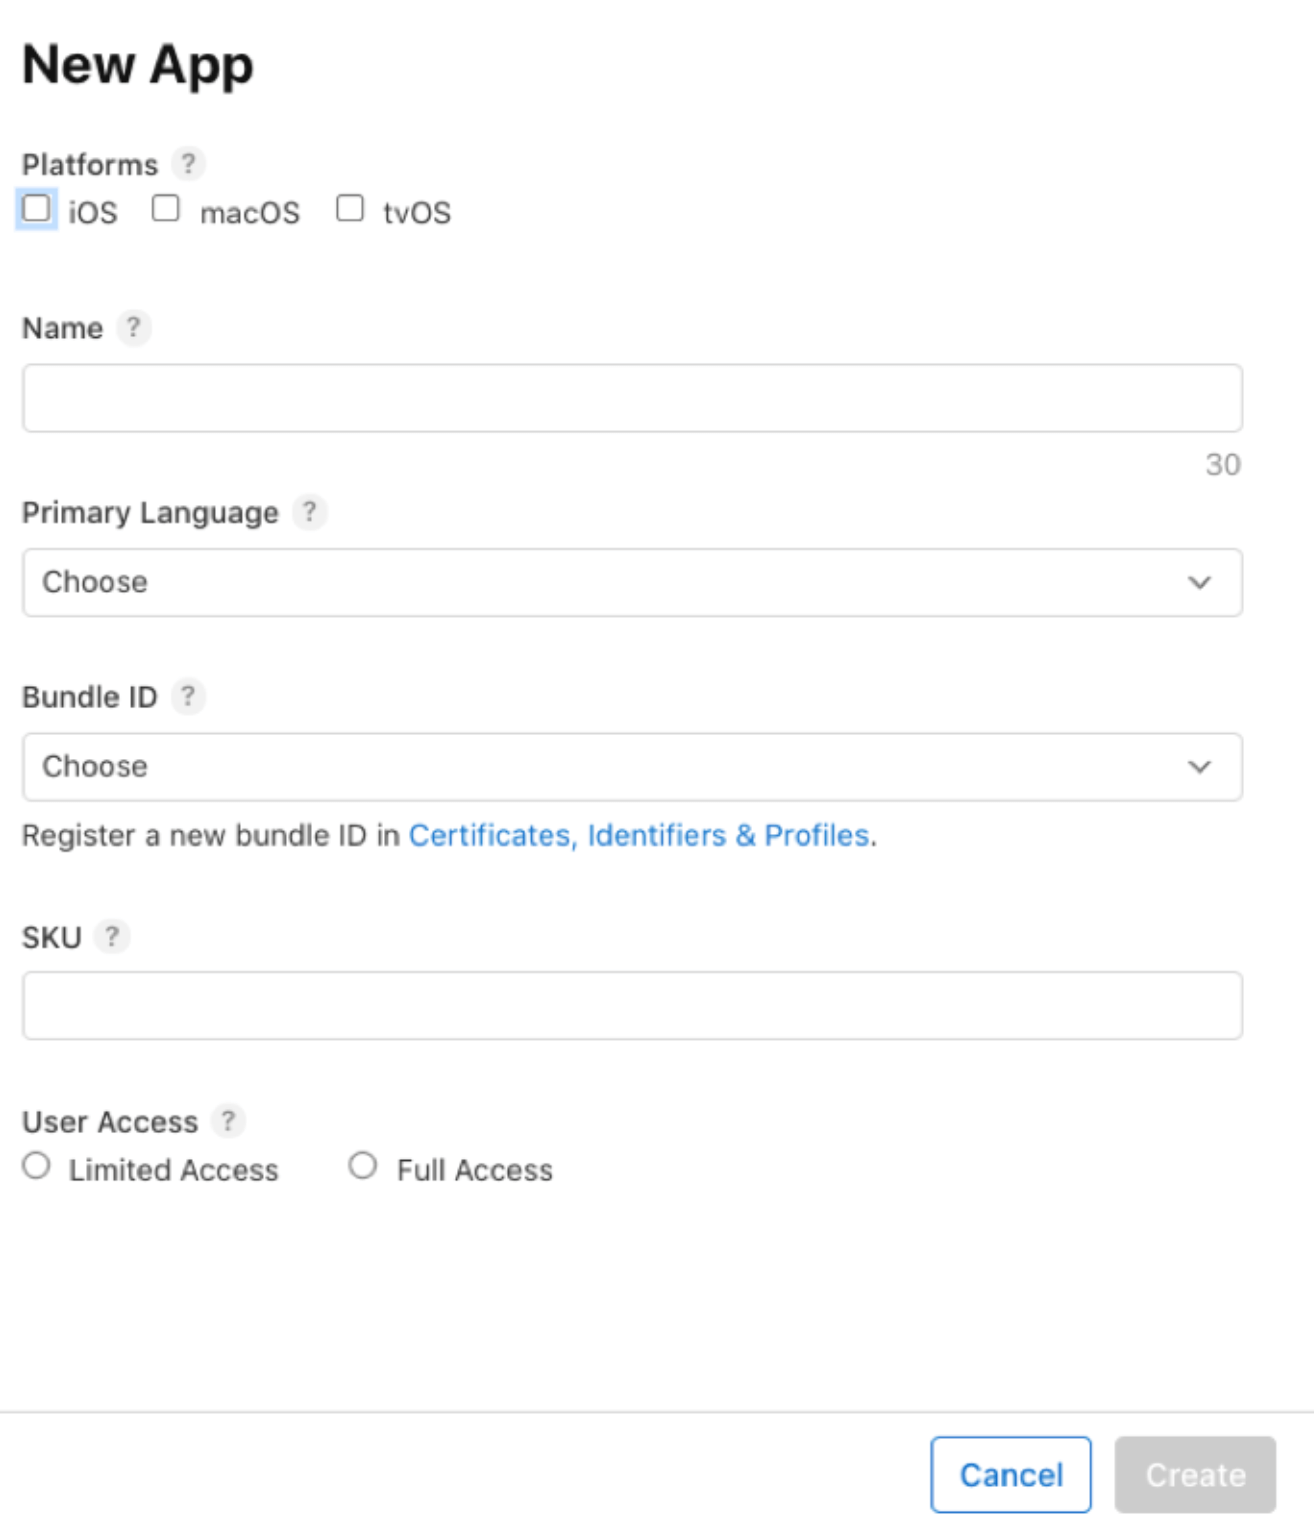
You will need to fill in the following information on your Product Page:
- Platforms – specify which Apple platforms your app supports.
- App name – this is the primary app name that users will see in the App Store. Because the app’s name must be verified, it needs to be unique. It's also limited to 30 characters.
- Primary language – the main language for the app’s information.
- Bundle ID – here, you can select from the app identifiers registered in the developer account. This value is unique for every app on the App Store. The Bundle ID must be an exact match of the bundle identifier in your Xcode project’s Info.plist file (in the target’s General > Identity section).
- SKU (Stock Keeping Unit) – an optional field not visible to users. It can be an identifier you use in your company or something else that is meaningful for you.
- User access – specify if your application will be accessible to all members of your App Store Connect organization or restricted to specific groups.
After filling in all the required fields and tapping the Create button, you'll be taken to the Product Page. Here, in the App Information section, you can add localizable information. This is very important for iOS apps that target different regions. If you don't add this information, the app will default to the primary language you previously set.
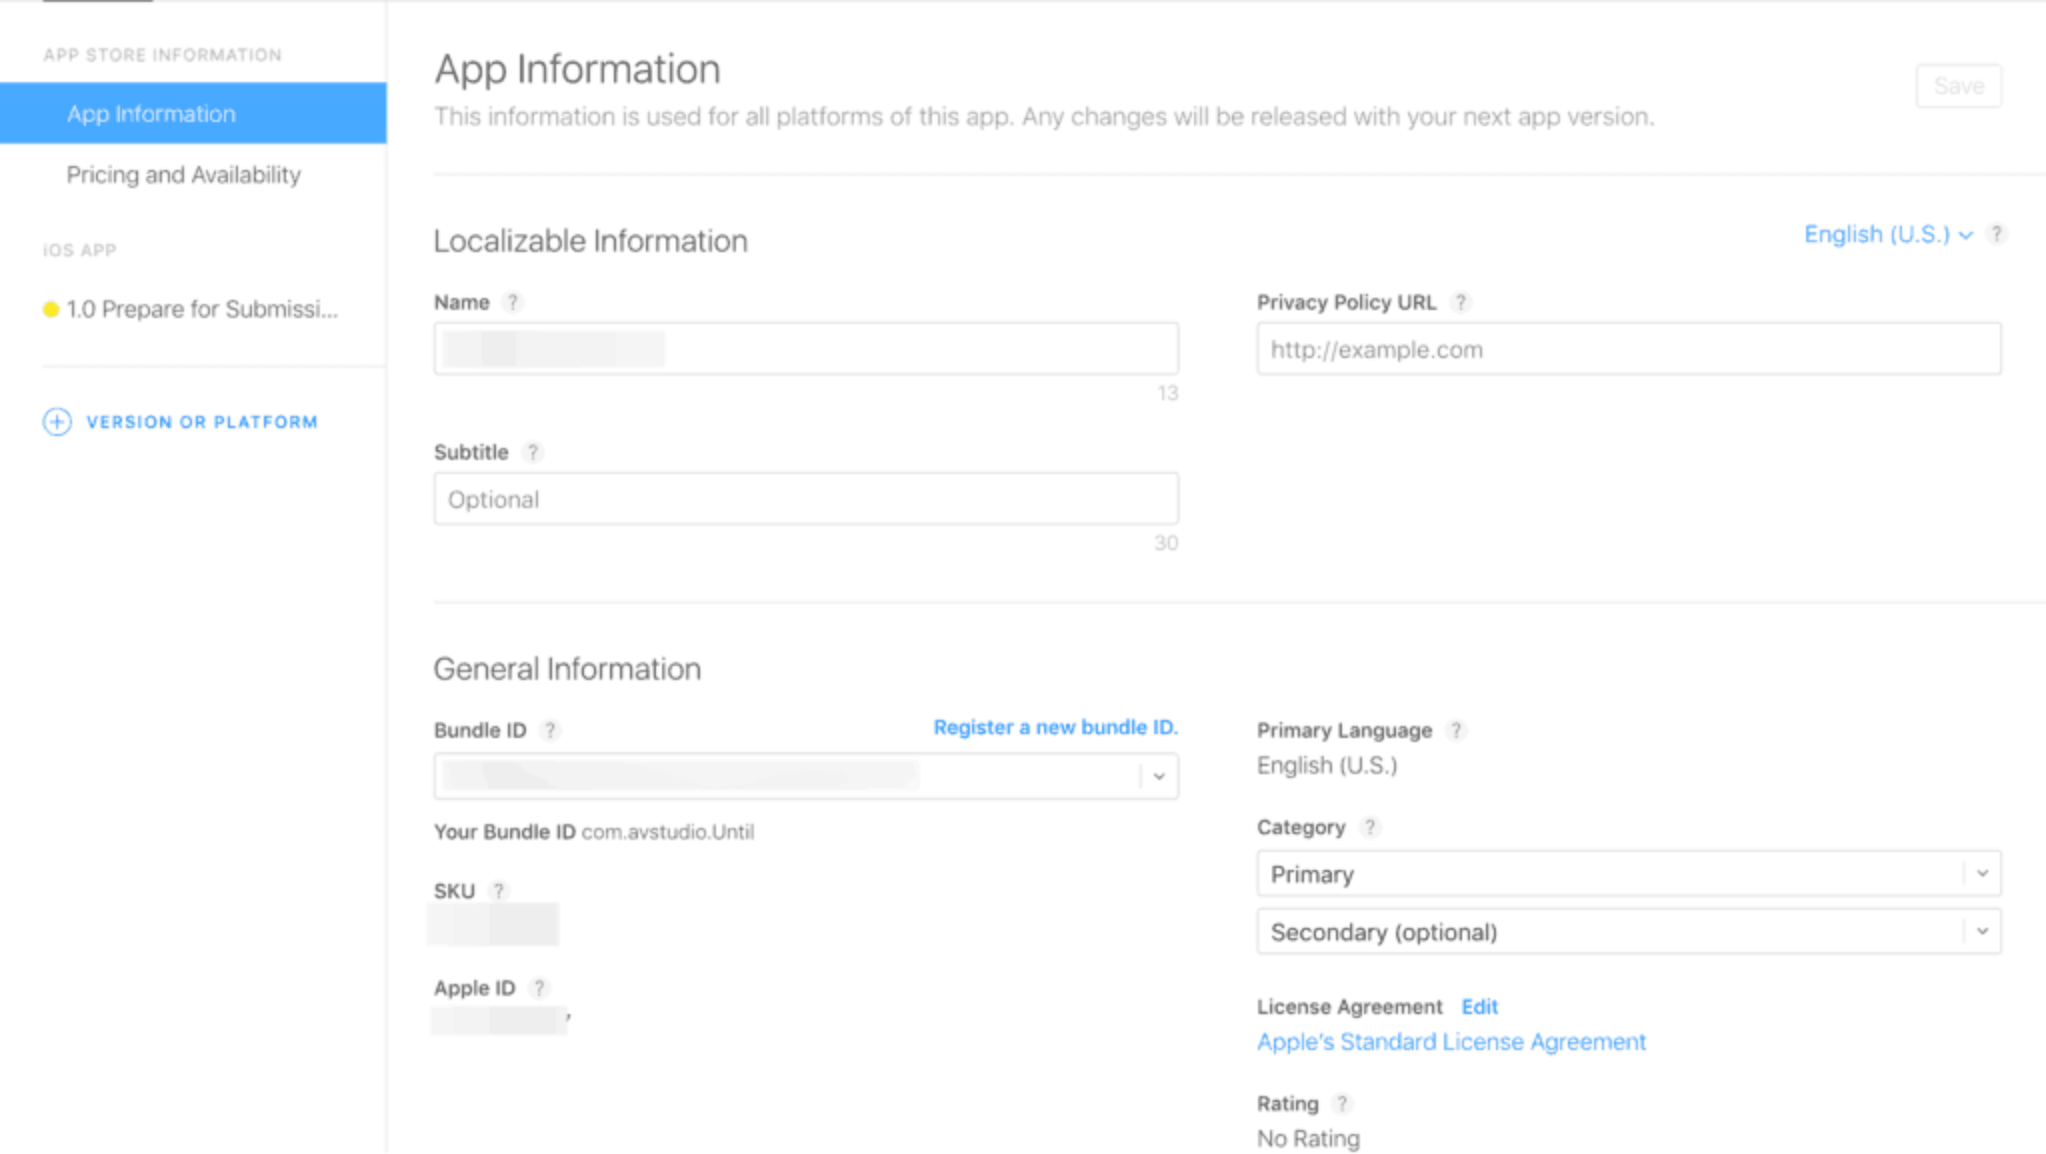
The app category is one more value to fill in. You must choose a primary category, and if your app belongs to more than one, you can pick a secondary category.
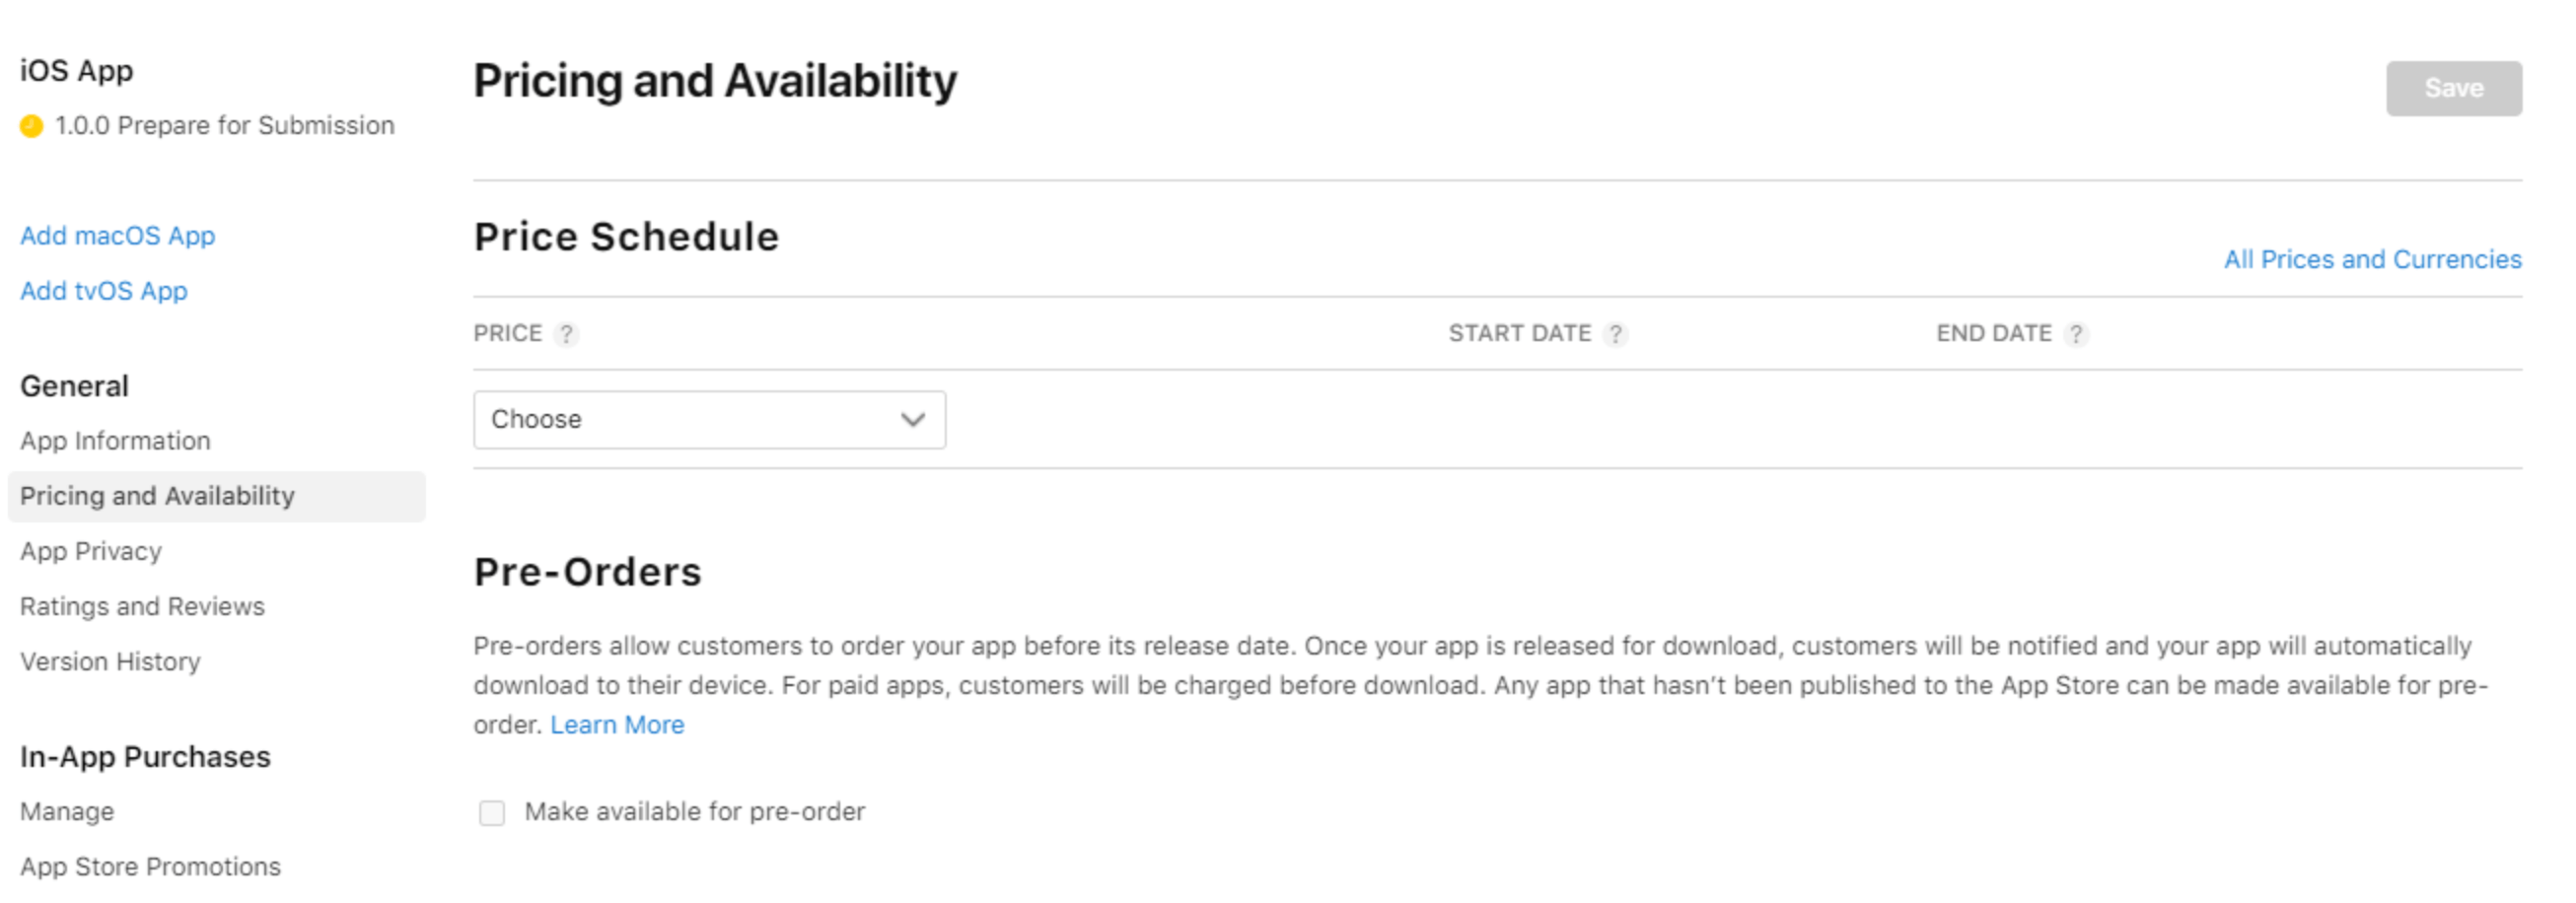
If your app is paid, set the pricing in the Pricing and Availability section. Unlike the Google Play marketplace, the App Store doesn't allow you to set an arbitrary price. You need to choose from Apple's predefined price tiers. Here, you can also manage the availability of your app for different countries, an option that comes in handy for soft launches.
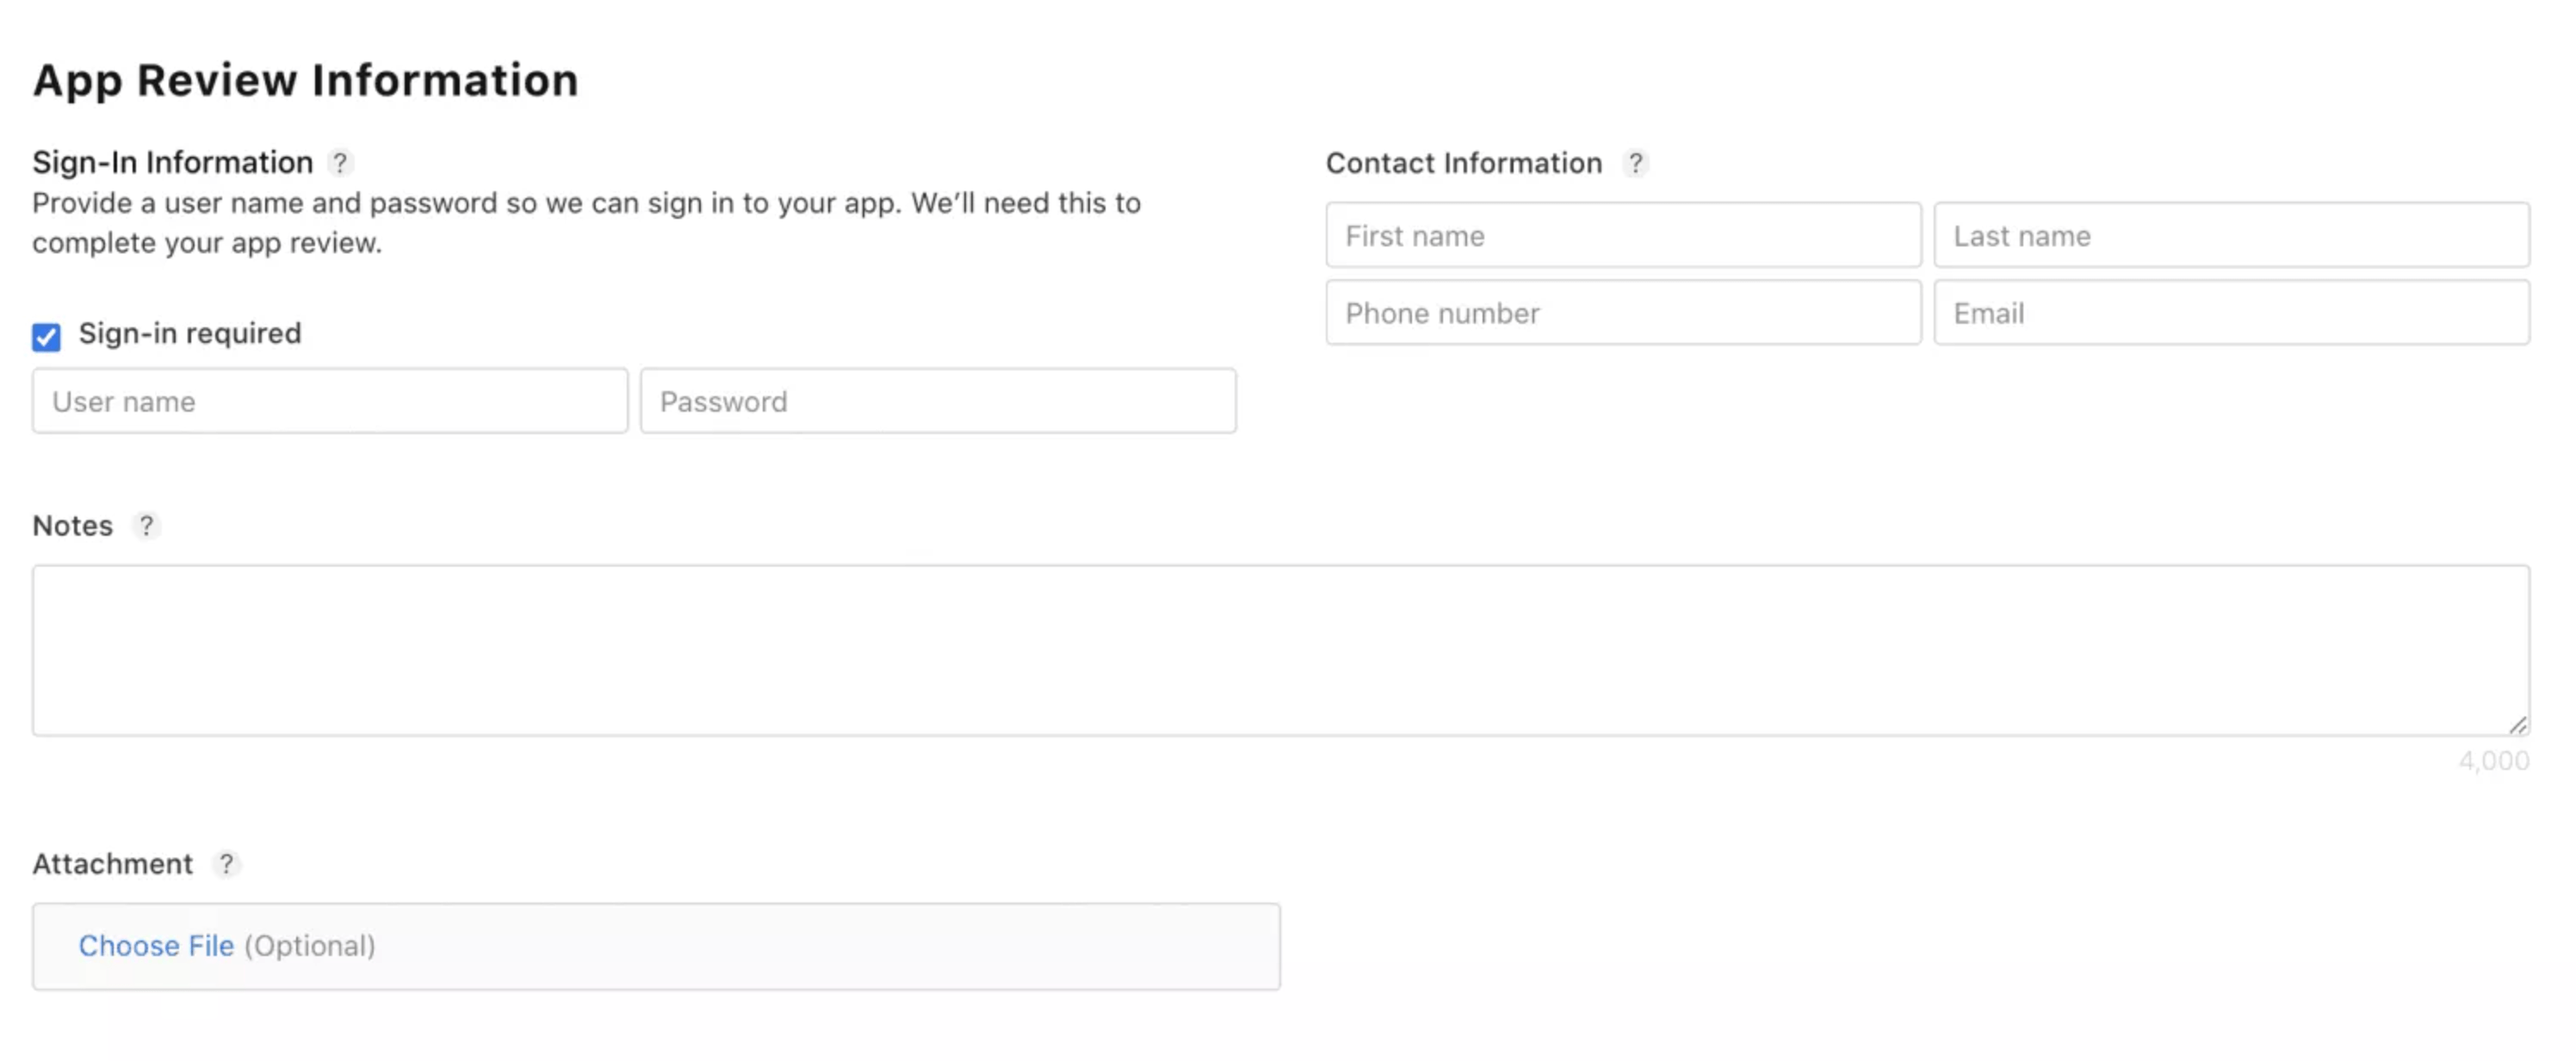
If your app requires a sign-in, you must provide test credentials for the Apple reviewer and fill in your contact information in case the Apple team needs to reach you.
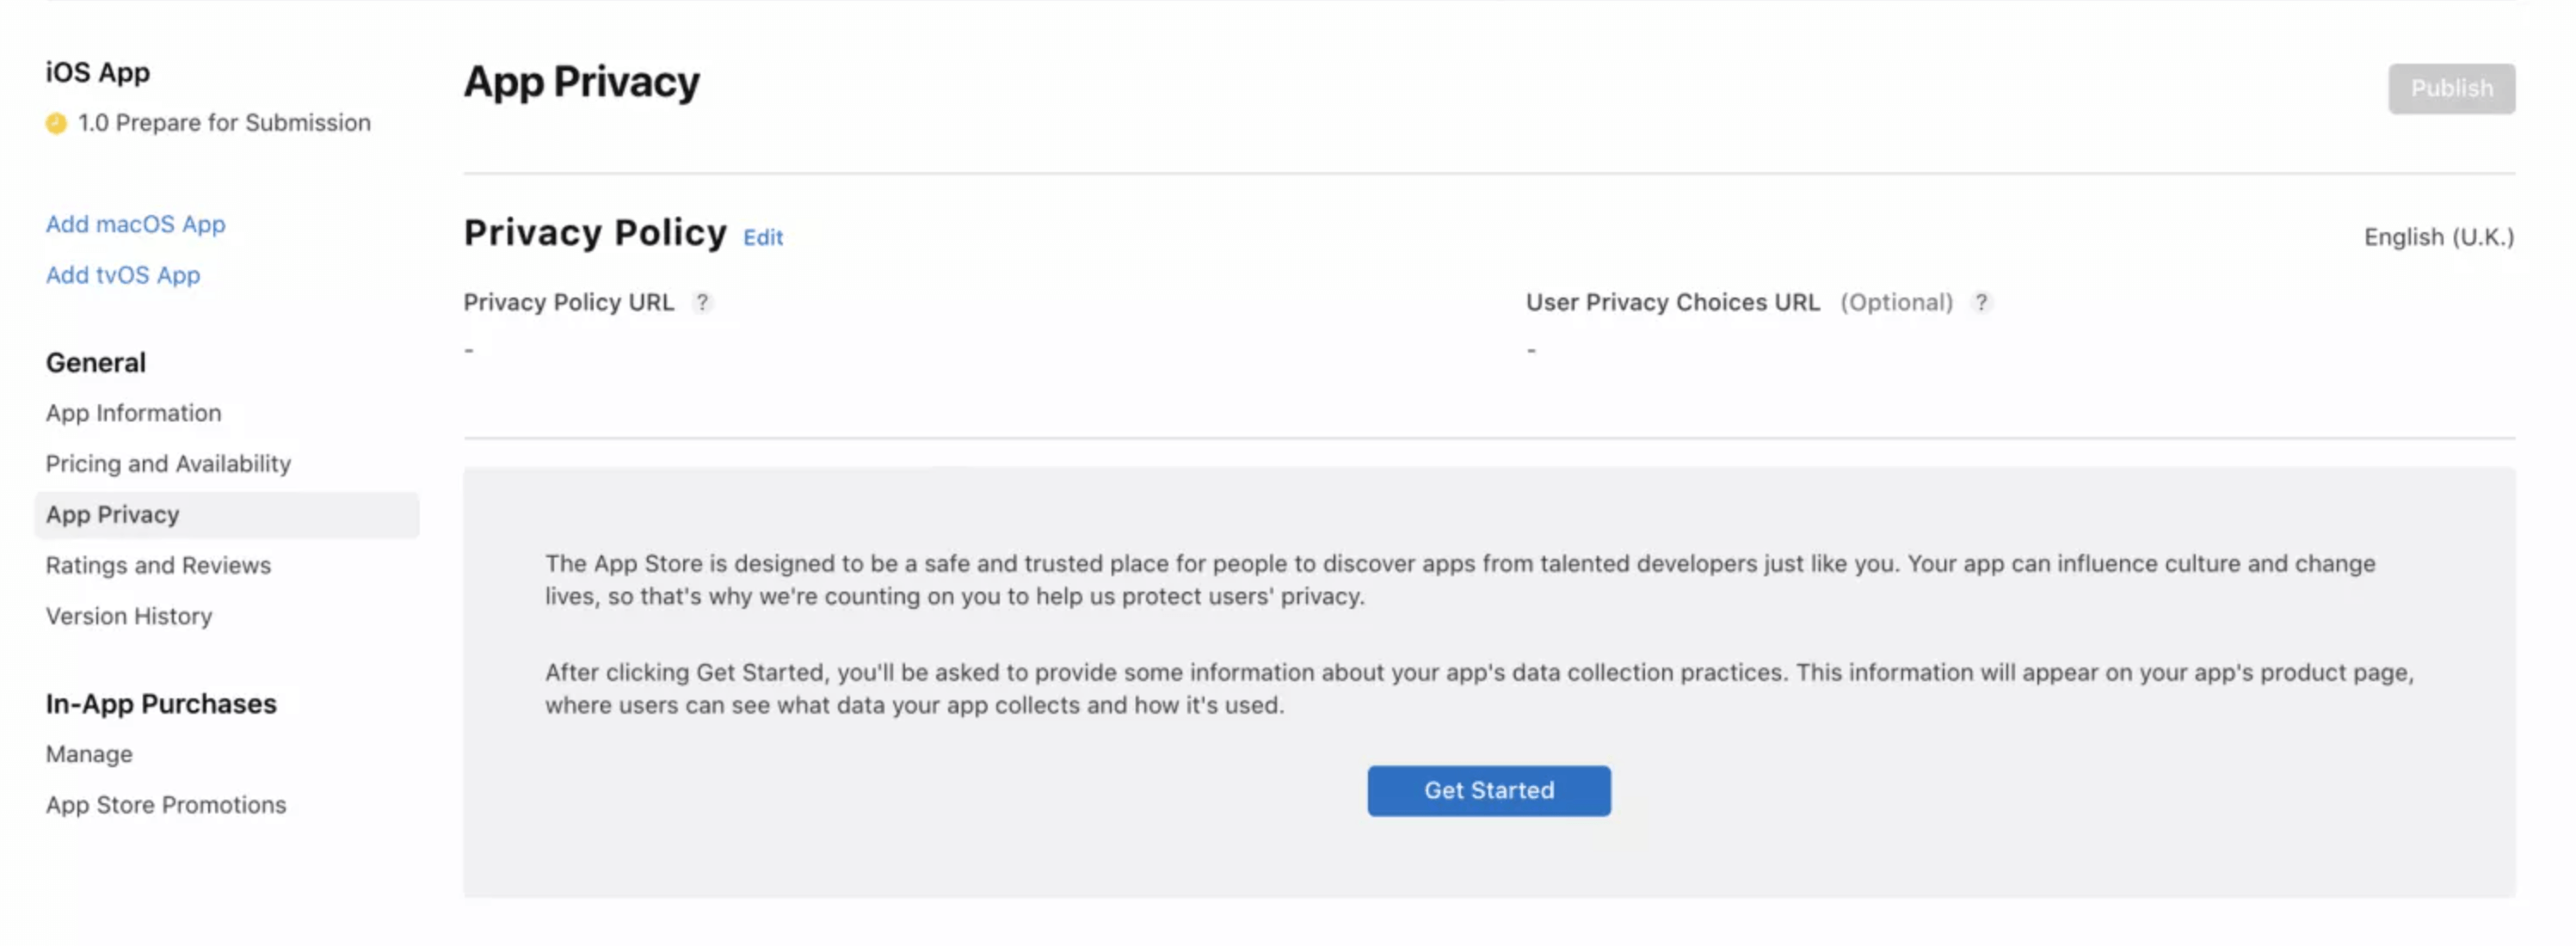
In the App Privacy section, the Privacy Policy URL is required. It will be visible on your app’s page and can either be a link to a PDF file or a web page. The privacy policy must now explicitly identify all data collected, confirm third-party protection standards, and explain data retention and deletion policies.
3. Set the roles, certificates, identifiers & profiles
After registering, you need to set roles, permissions, certificates, identifiers, profiles, and more. Check out the Roles for the Apple Developer Program for more information about roles and permissions. Your developers also need to get permission to create certificates and provisioning profiles — otherwise, they won't be able to make any changes.
Once granted, developers can sign the app and define its identifier and capabilities in the Certificates, Identifiers & Profiles section.
- Distribution certificate – the certificate that identifies your app development team and allows you to submit an app to the App Store.
- App ID – the identifier of your app. The Bundle ID must be the same as the bundle identifier in your app’s binaries.
- Provisioning profile – since only signed apps can run on iOS devices outside of the App Store, you'll need provisioning profiles to install and test your app on specific devices before submitting it to the App Store. Each app needs a provisioning profile for development, testing, and App Store distribution.
4. Upload your app build
Next, the developers need to assemble the app's build and upload it via Xcode. In the Signing and Capabilities section, choose the right account. In the General section, set the app version (1.0.0 for new releases) and increment the build number for updates.

After you fill in all the necessary information, go to Product -> Archive and let it bundle your app. When the archive is complete, the app archive window will open, allowing you to manage all the archives generated by Xcode. Then, press the Distribute App button and upload your build to App Store Connect. Xcode will automatically generate all the certificates, alerting you to any errors.

📌 As of April 28, 2026, your build must use Xcode 26 or later with the iOS 26 SDK. Builds submitted from older Xcode versions will be rejected outright by App Store Connect.
5. Test your app
Once your app is uploaded to App Store Connect, you need to open the TestFlight section and add QA engineers to your Apple team so that they can test the app and fix any remaining bugs.
📌 You can now submit in-app events, custom product pages, and product page optimization tests for review without needing a new app version. This feature is useful for testing promotional content independently of a full release.
6. Fill in the version information
Now, you need to go to App Store Connect and choose the iOS app you want to publish. Here, you need to add the app’s screenshots (in JPG or PNG format) and any essential information.
Screenshots
You can upload up to ten screenshots. Apple requires at least one screenshot for the 6.9-inch display to submit an iPhone app. You can check out the Screenshot specifications to study Apple's requirements. Screenshots need to be both informative and catchy. If there's no app preview, the first two screenshots will be displayed in search results, making them one of the first things the user sees. Screenshots can be different for each supported language.
App previews
An app preview is an optional short video demonstrating the core app features. It can be up to 30 seconds long, and you can add up to 3 app previews per device type. Similar to screenshots, the app preview can be localized.
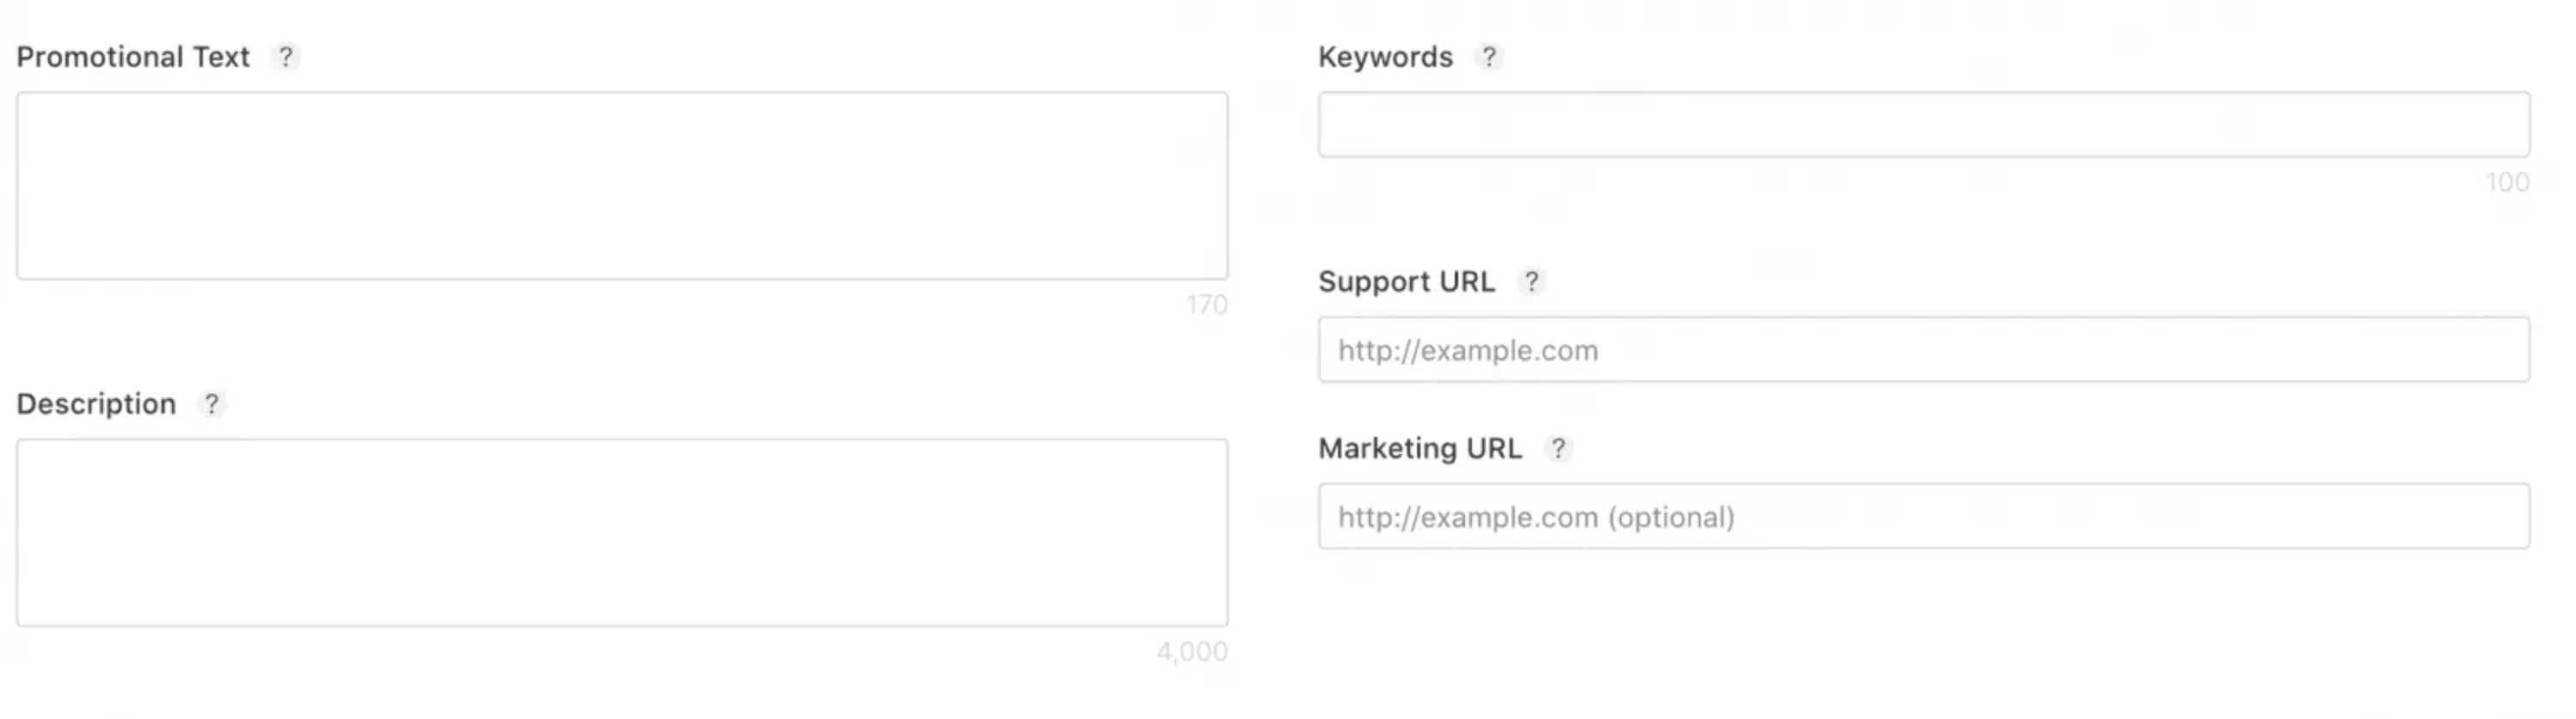
Promotional text
The promotional text is the only field you can update without adding a new version of the app to the App Store. Users can see the promotional field before they press the Read More button. This is an optional field.
Description
The description field contains all the information about the app features. It must not exceed 4,000 characters.
Keywords
Keywords help users discover your app in the App Store and help boost its visibility in search results. Here are some requirements for keywords:
- Keywords must not exceed 100 characters
- Use spaces to separate words within keyword phrases
- Use commas to separate keywords and keyword phrases
Support URL
This required field links to a page where users can get help. Ideally, it should be the official website for your app.
Marketing URL
This field links to a page where users can find marketing information about the app.
Icons
Your app icon should be unique and give a valuable sneak peek at your app. Apple specifies the correct shape and requirements in the Human Interface Guidelines.
The main requirements include:
- Resolution: 1024px x 1024px (Xcode and App Store Connect will generate additional sizes automatically for iPhone, iPad, Apple Watch, etc.)
- Format: PNG
- Color space: RGB, flattened with no transparency
- Shape: Square with no rounded corners
Note that you cannot change the app information in the App Store Connect right after publishing. All the information, except for the promotional text, can only be changed with version updates. So, check all the fields carefully before submitting the app. If applicable, you will also need to complete sections for App Clip, iMessage App, and Apple Watch.
📌 Apps built with the iOS 26 SDK will by default, apply Apple's new "Liquid Glass" visual style to native UI components. If you want to opt out and maintain your existing visual design, you'll need to explicitly configure this in your project before submission.
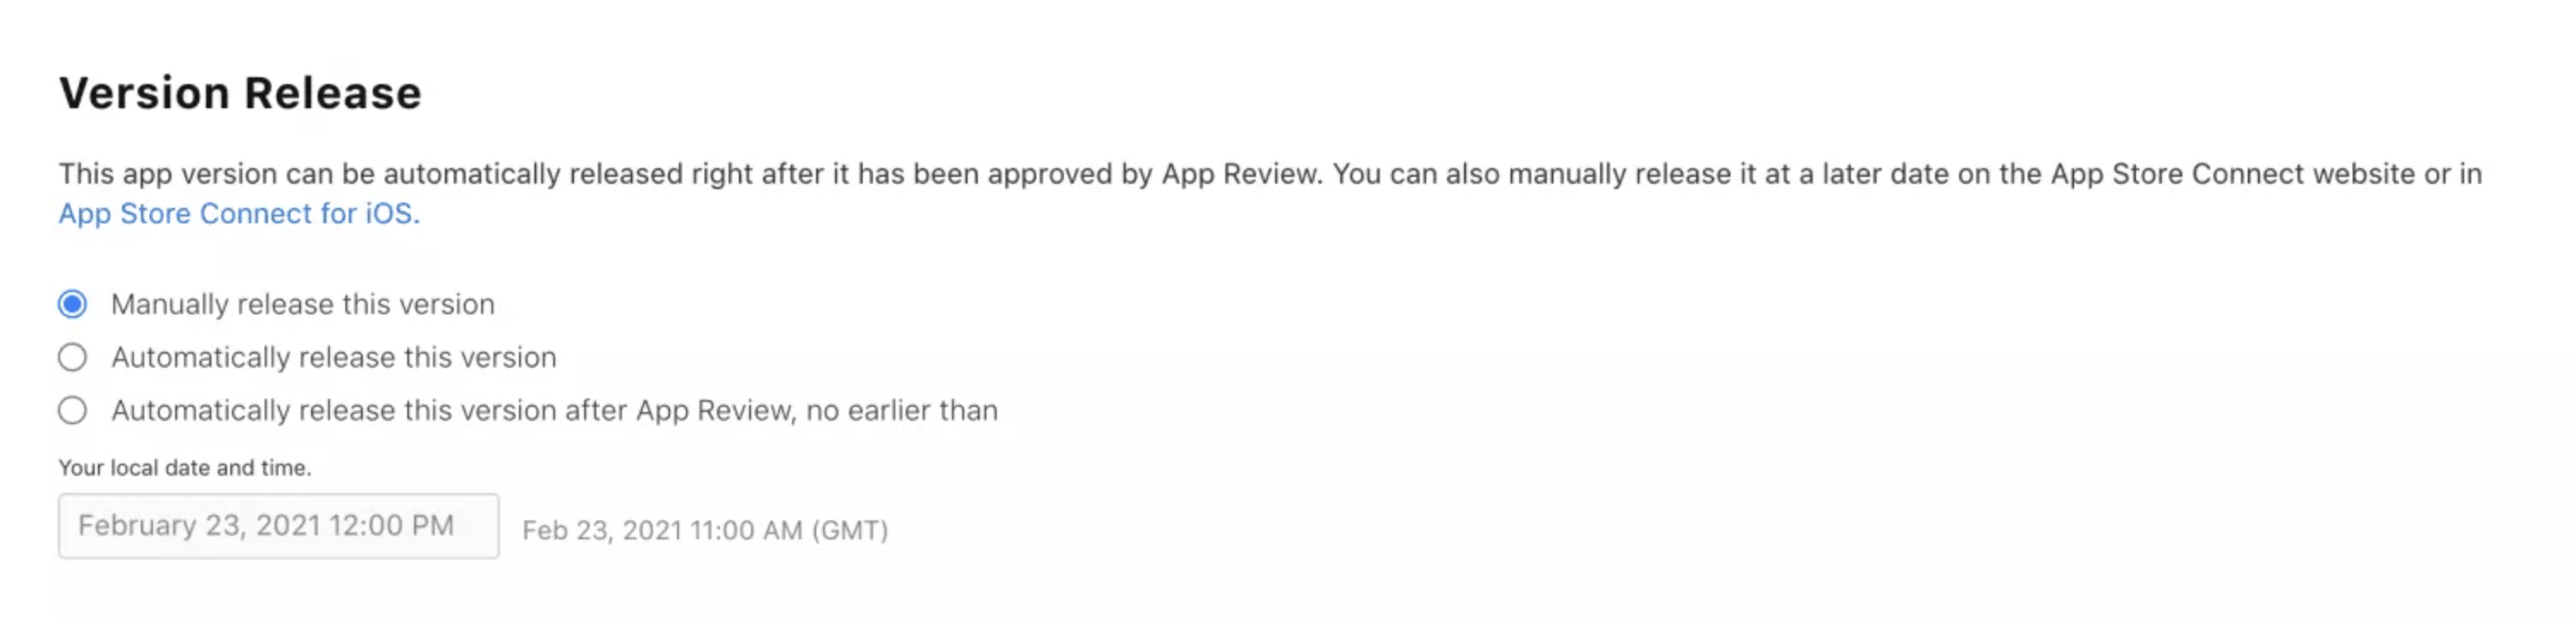
7. Choose the release date
After you submit the app for review, it is placed on the waiting list for Apple's review and certification team. In 2026, most submissions are reviewed in less than 24 hours, but complex apps may take longer.
You can choose the release mode for your app:
- Manually - you will need to click the Release button after approval.
- Automatically - your app will be automatically released right after approval.
- Automatically with date - the app will be released on a specific date after approval.
📌 If you're working toward a specific launch date tied to an event, you can request an expedited review for event-related apps or critical bug fixes. Include your event date and the app's connection to it when submitting the request.
You can now manage submissions, communicate with App Review, and view submission history all from the App Review page in App Store Connect, even when you have no active submissions. You can also include multiple items in a single submission and remove items with issues while keeping the accepted ones.
8. Set age ratings
This is the last step before submitting your app for review. You need to go to the Set app age rating section and complete the survey. Apple will set the age rating of your app automatically based on the answers.
9. Submit your app for review
Now, you can submit your app for review. Go to TestFlight and choose the tested app build. Double-check your app for compliance with all Apple requirements.
📌 If you submit a bug fix update and Apple's review team finds additional issues, you have the option to resolve those separately in your next submission, as long as there are no legal or safety concerns. Simply reply to the offer message in App Store Connect to accept.
Reasons why your app might get rejected
The App Store has a rather strict approval process. In 2024 alone, Apple blocked nearly 2 million risky app submissions from reaching users.
There are many reasons why your app can be rejected from the App Store. Most common yet non-obvious reasons for App Store rejection include:
Inconsistent UI and UX
Since Apple has strict guidelines on the look and feel of the apps, violating them can lead to rejection. Check out Human Interface Guidelines to find out more about baseline design expectations and best practices.
Inaccurate screenshots
Screenshots must accurately reflect the actual app experience. UI and product images must match the corresponding device type in App Store Connect. Using text or overlays that obscure the UI or screenshots that don't match the app's real functionality is a common rejection cause.
Privacy policy issues
Your privacy policy must identify all data collected and how it's used, confirm third-party data protection standards, and explain data retention, deletion, and consent revocation. It must be linked both in App Store Connect and accessible within the app.
Bugs and crashes
When you submit your app for review, ensure it is stable and that no bugs arise during the review process.
Finalize all images and text before submitting. Items that still contain placeholder content are not ready for distribution and cannot be approved.
Broken links is a common rejection reason. All links in your app must be functional. A link to user support with up-to-date contact information and a link to your privacy policy are required for all apps.
Sign in
If your app requires users to create an account, you need to share a test account with the Apple Review Team.
Access to users' data
If your app requires access to contacts, location, and photos, you need to justify this to the Apple Review Team.
Not enough lasting value
Another reason for a release failure is the lack of value-added features or content. Apps targeting a very small niche may also struggle to get approved by the Apple App Store. Before publishing, take a look at the applications in your category and compare them with your product to make sure it provides value.
Copycats
Apps that actively copy other apps won't pass review. Focus on creating unique experiences that aren't already available.
Submitted by an incorrect entity
Some application types must be submitted by the legal entity that provides the app-related services. These include compliance-heavy solutions such as healthcare applications, banking software, cryptocurrency, and others.
Repeated submission of similar apps
You can't slip through the review by submitting multiple similar applications. You must consolidate the functionality into one high-quality product and submit it for review.
💡 Sometimes, even apps that meet all the guidelines can still get rejected. In most cases, a few follow-up revisions are enough to fix the reported issues. Use the Resolution Center in App Store Connect to communicate with Apple about any issues you may have. You can also escalate the issue and submit an appeal if you believe your app was unfairly rejected. You can find more information on rejection causes in App Store Review Guidelines.
💡 Apple also offers 30-minute Webex appointments with the App Review team where you can ask about guidelines, common rejection causes, and how to align your app before submission.
Summing up
There are lots of things you need to consider when you upload an app to the App Store. In short, to successfully submit an app to the App Store, you need to check your app against Apple’s guidelines, carefully review your app's features and content, and make sure all legal, technical, and design requirements are met. If, for some reason, your submission is rejected, don't panic. Analyze the feedback from Apple and fix the mentioned issues.